By default, WooCommerce only allows importing data from CSV. So, you will need an external solution to integrate with Google Sheets.
Store Manager for WooCommerce import tool provides this functionality along with other import possibilities. Below you’ll find a guide showing how to connect to Google Drive and import products from Google Sheets to WooCommerce successfully.
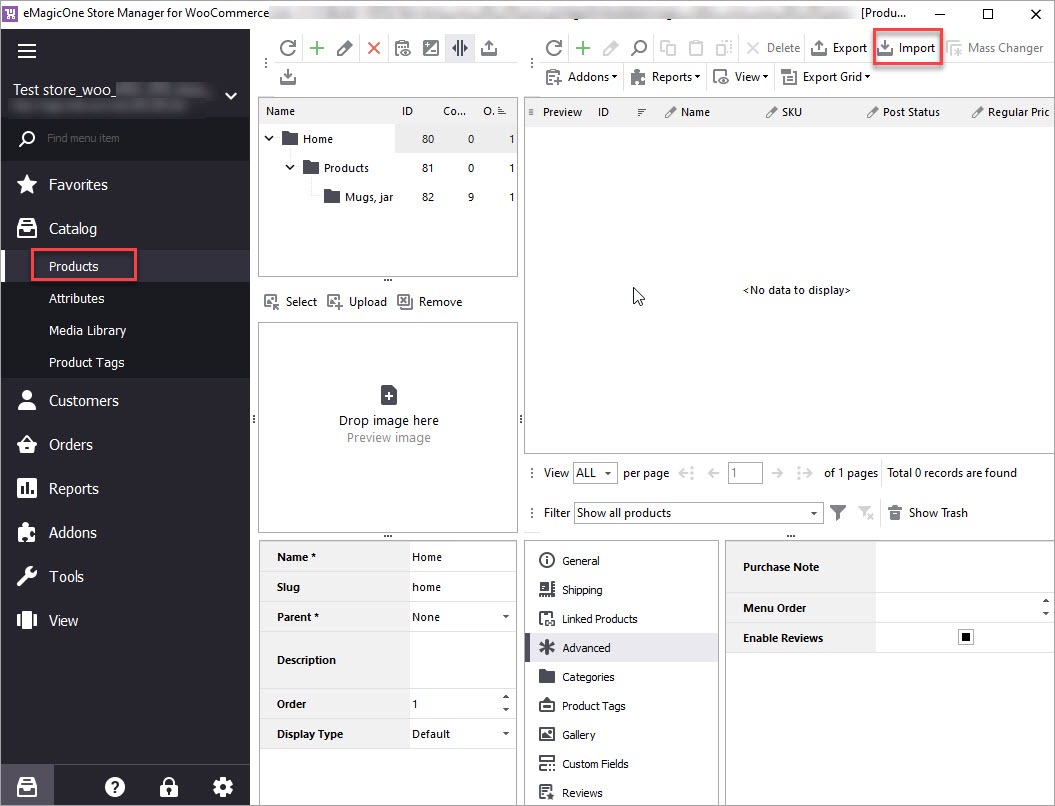
First of all, download a free trial version of Store Manager for WooCommerce, install the application and connect it to your store. When you’ve finished with the connection setup, you will see your category tree and products displayed in the application.
To connect to your Google cloud storage, launch any export or import tool with Store Manager. Let’s, for example, try to import products from Google Sheets as we don’t have any of them in our test store yet.
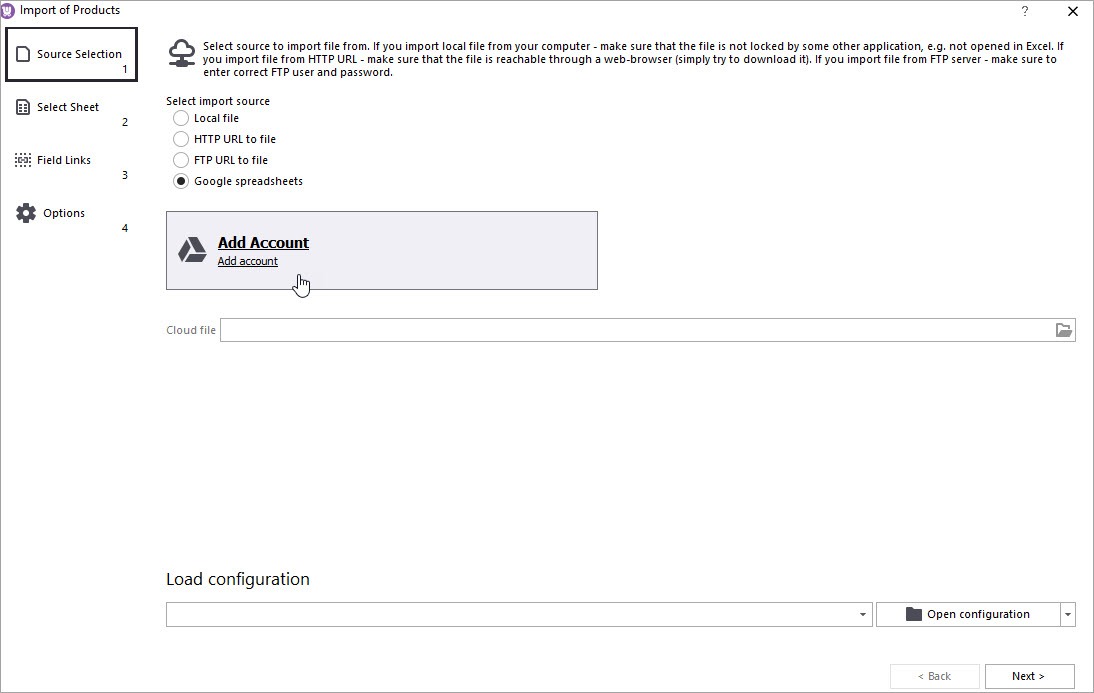
In the open Wizard among the available import sources, switch to “Google Spreadsheets”. Now you can add your Google Drive:
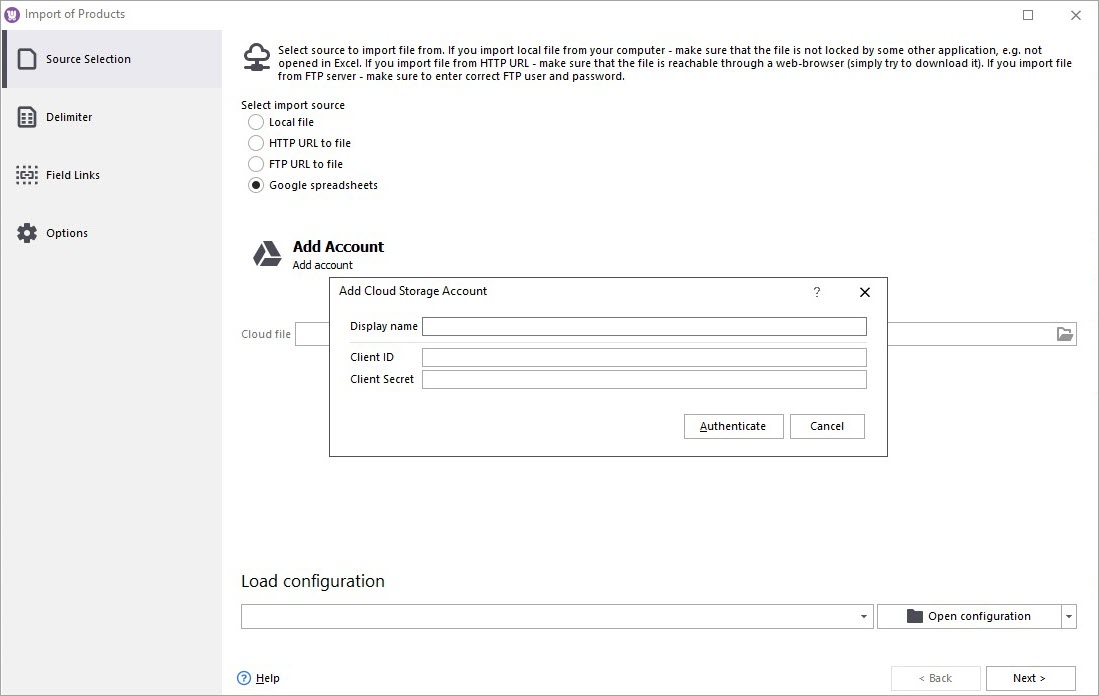
Enter a cloud storage name and press “Authenticate”. Learn how to generate Google API key to get access to Google Sheets with Store Manager in this article.
You will be redirected to the Google authentication window that provides your Google account sign in to Google Drive Integration. Selecting the account, you need to grant the addon access to view, modify, create and delete all your files on Google Drive; view and manage your Google Drive files and folders that are open or created with this Integration; view, modify, create and delete your spreadsheets in Google Drive.
After you’ve finished with authentication, close the browser and return to Store Manager.
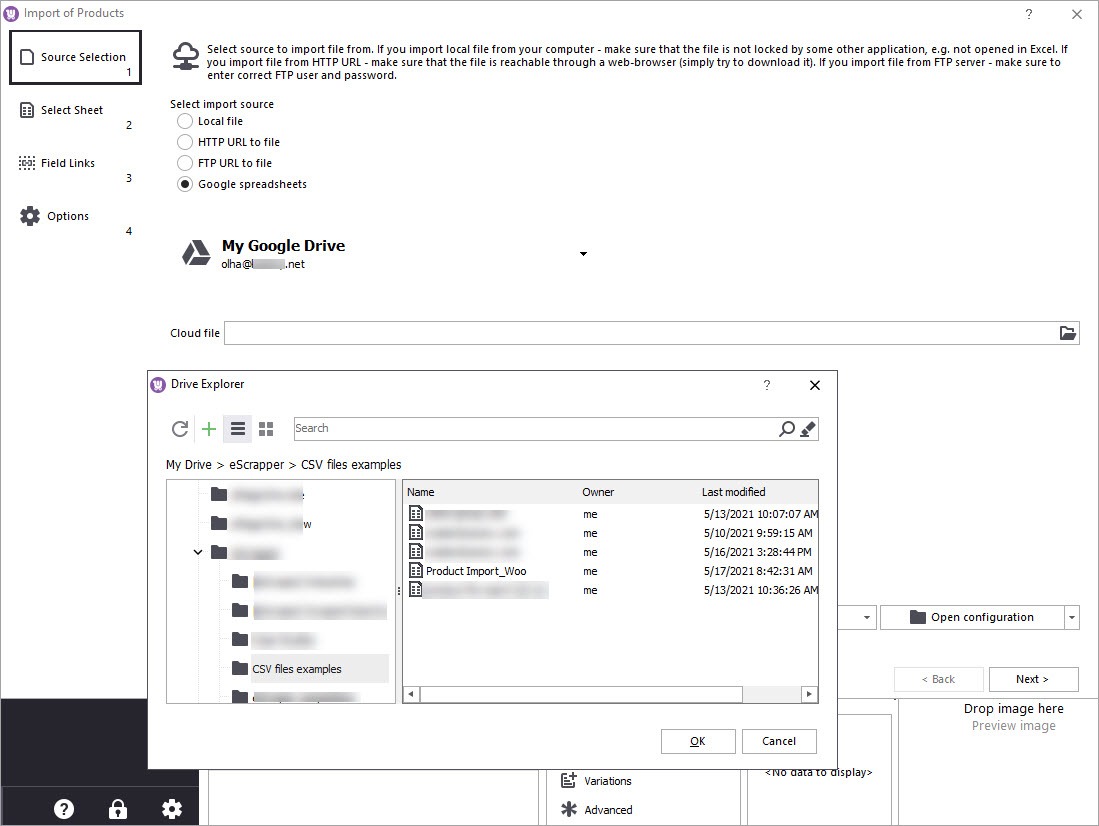
Now, when you have connected to Google Drive, open Drive Explorer. We’ve previously prepared a spreadsheet with products, so, we’ll select this document:
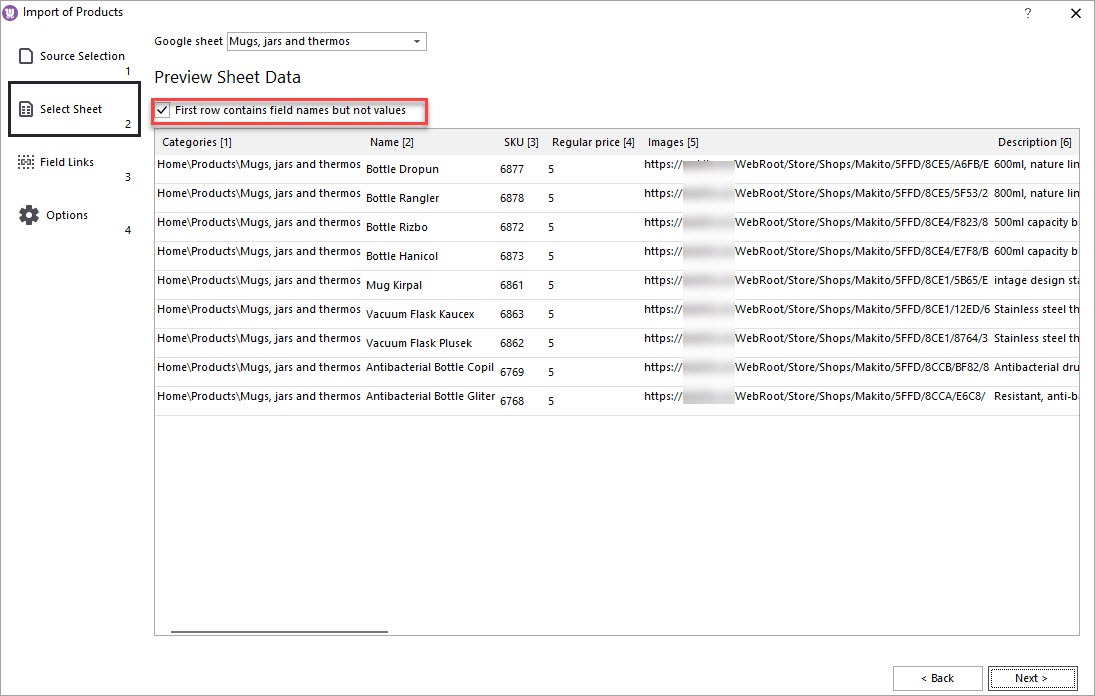
Next, select a Google sheet to import data from. If there are no column headers in your file, you just need to specify that in the settings. You’ll be able to assign columns to the database fields later in the mapping step.
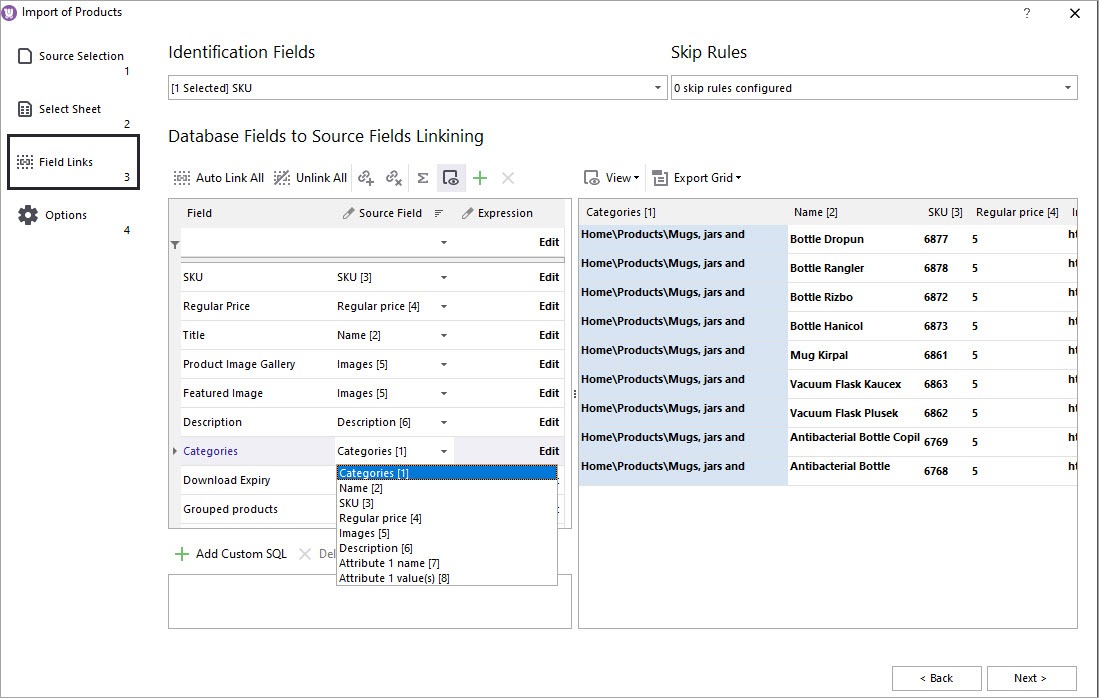
The next important step is mapping spreadsheet columns to the database fields. To see how to map fields and configure other import options, watch this 5-minute video:
When you’ve finished with mapping, check the identifier that will be used during import. You can leave SKU as an identifier if you are adding new products. If you previously exported products with IDs and now are importing them back, you can use ID as an identifier.
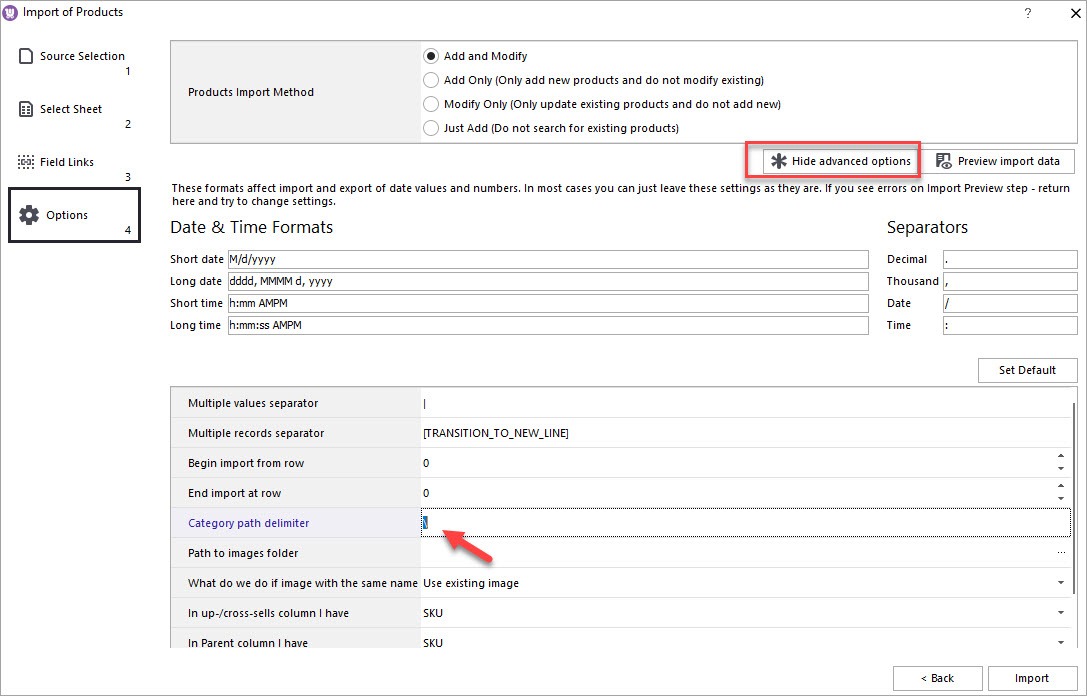
Move to the subsequent step where you can choose whether you want to update existing records, create new ones or do both. There are four options available:
Also, expand the Advanced options section to select a correct delimiter for the category path and specify other settings related to your specific task.
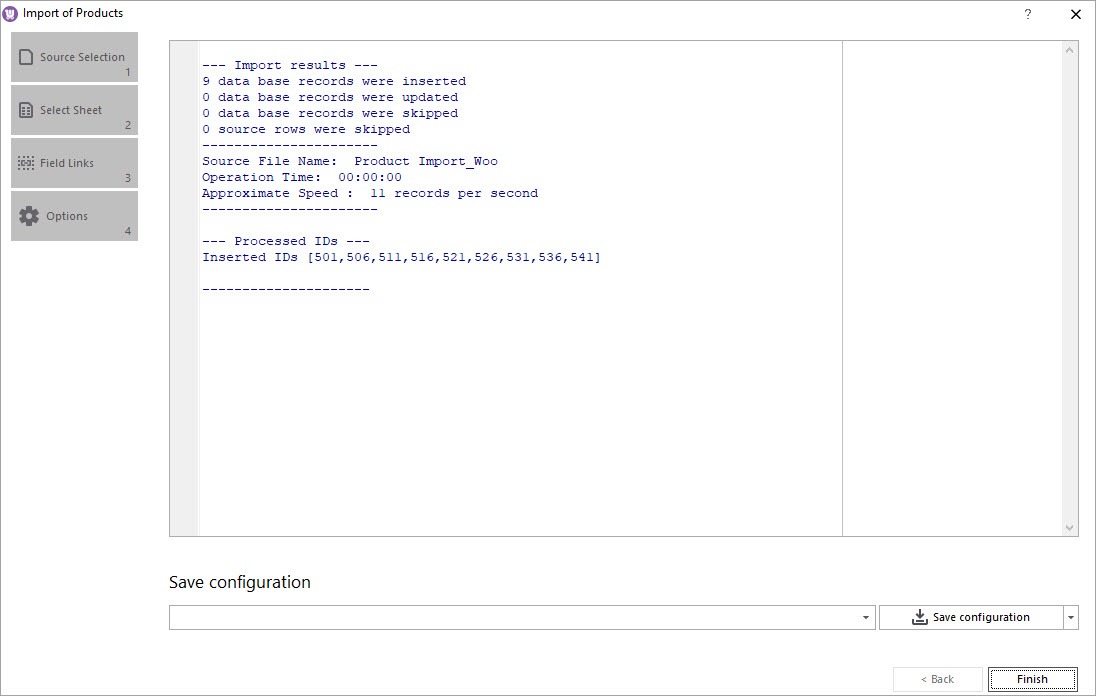
This is the final step in the wizard. You can preview data and change some settings if necessary. To begin the upload, press “Import”.
After products have uploaded, look through the results, and press “Finish” to exit.
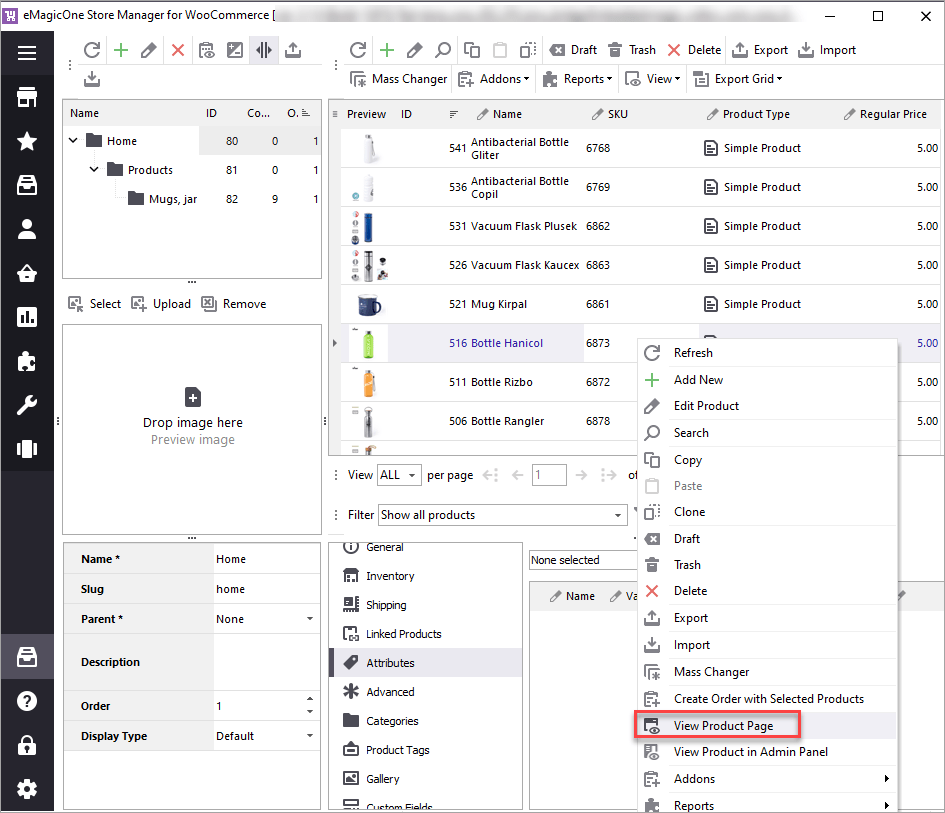
As you can see, products with images were created in Store Manager. Let’s right-click on a product to view it at the store front:
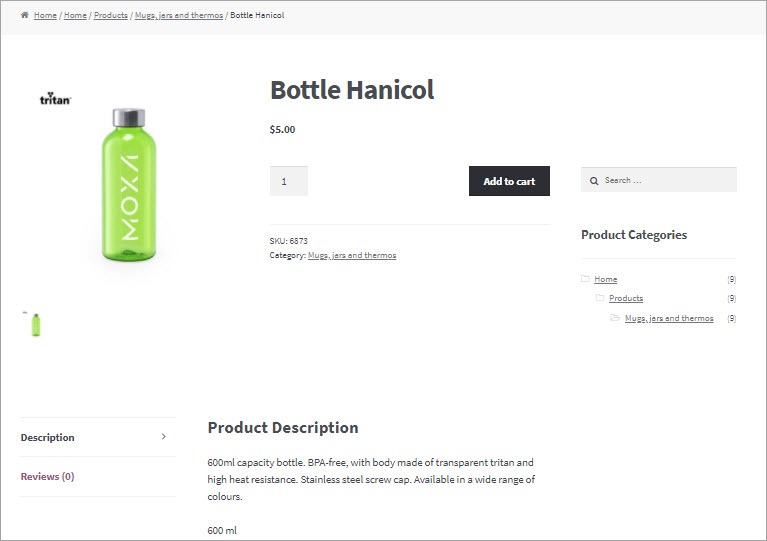
Here is one of the imported product on our test WooCommerce store:
Use Store Manager to perform Google Drive and WooCommerce Integration. Easily import data from your multiple suppliers, export/import data for analyses and updates.
Import category tree or separate subcategories provided by your supplier in Google Sheets format using Store Manager application. Read More...
Export WooCommerce filtered products and separate fields to Google Sheets sharing with a supplier for replentishment via Store Manager smart Export Wizard. Read More...
Set up an automated upload tasks from suppliers for catalog update from local files, HTTP or FTP links and more. Read More...
Create and upload your WooCommerce catalog feed to Google Merchant Center via Store Manager software. Read More...