Export WooCommerce Orders to QuickBooks Desktop
QuickBooks is a powerful accounting software that is used by small startups, large online stores and manufacturers to manage finances. As WooCommerce and QuickBooks aren’t connected directly you have to find some external solution to integrate both. The integration will help you to avoid transferring data manually, and therefore increase the accuracy and efficiency of work.
In this article, we will describe how to export WooCommerce orders to Quickbooks automatically using QuickBooks Integration in Store Manager for WooCommerce.
Steps to transmit WooCommerce orders to QuickBooks:
- In Store Manager for WooCommerce, launch QuickBooks Integration and run Orders Export Wizard
- Select customer identification method and orders that will be transferred
- Establish connection between your store and QuickBooks application
- Specify order export options
- Map customers from your store to QuickBooks
- Map products
- Perform the export and check orders in QuickBooks
How to Export WooCommerce Orders to QuickBooks Step By Step
1.In Store Manager for WooCommerce, launch QuickBooks Integration and run Orders Export Wizard
If you already use Store Manager, open Store -> Orders and select the records you would like to export to QuickBooks.
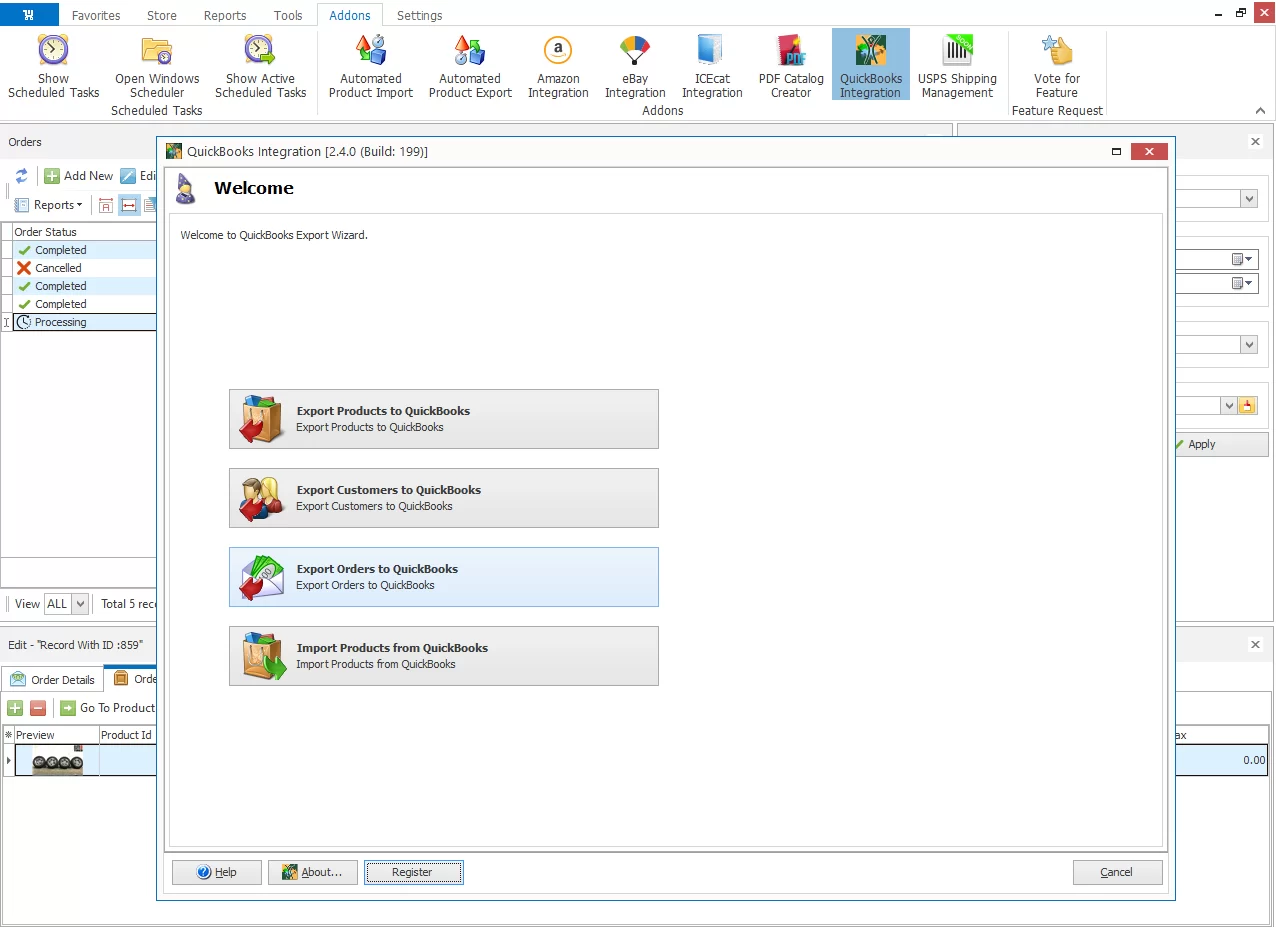
After you selected necessary orders, press “QuickBooks Integration” on the toolbar or right-click on the selection to open context menu. In the context menu, point to Addons and select QuickBooks Integration.
In the Welcome window, click “Export orders to QuickBooks” to launch the export wizard:
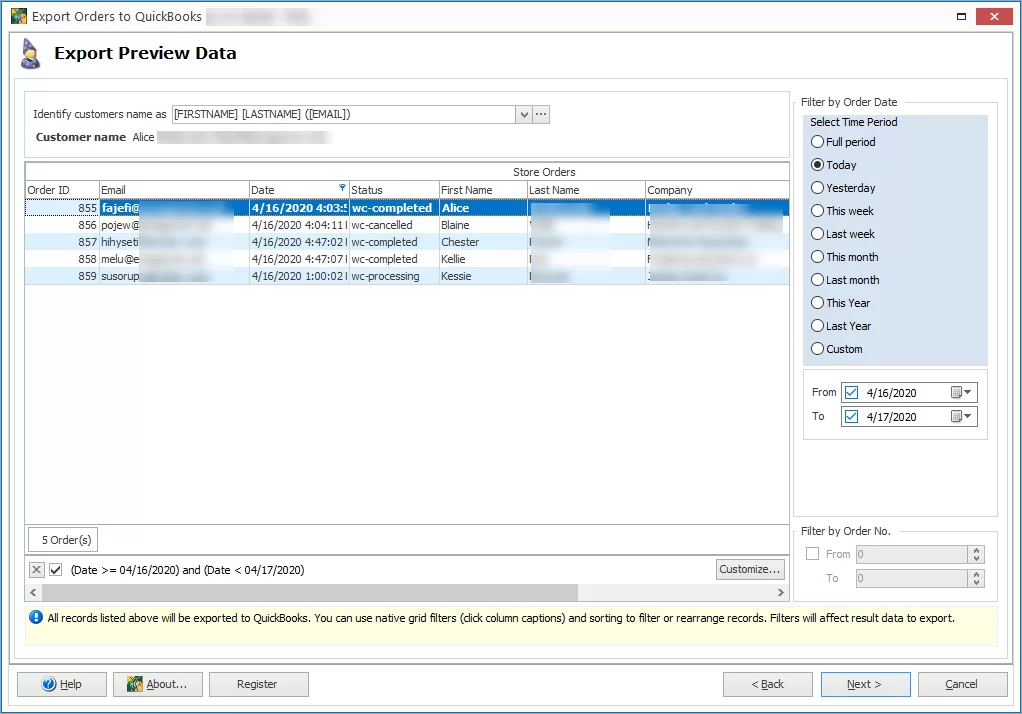
2. Select customer identification method and orders that will be transferred
As you may already know, orders are assigned to certain customers. That means that during synchronization a customer serves as an identifier. So, on the first step, in the preview window you have to specify how you want to identify a customer: by email, first name + last name, first name + last name + (email), or company + (state).
In the same window, you can choose which orders will be transferred from WooCommerce to QuickBooks desktop filtering them by date or order number:
Pressing the “Customize” button opens Filter Builder tool where you can set additional conditions to filter the orders to be exported:

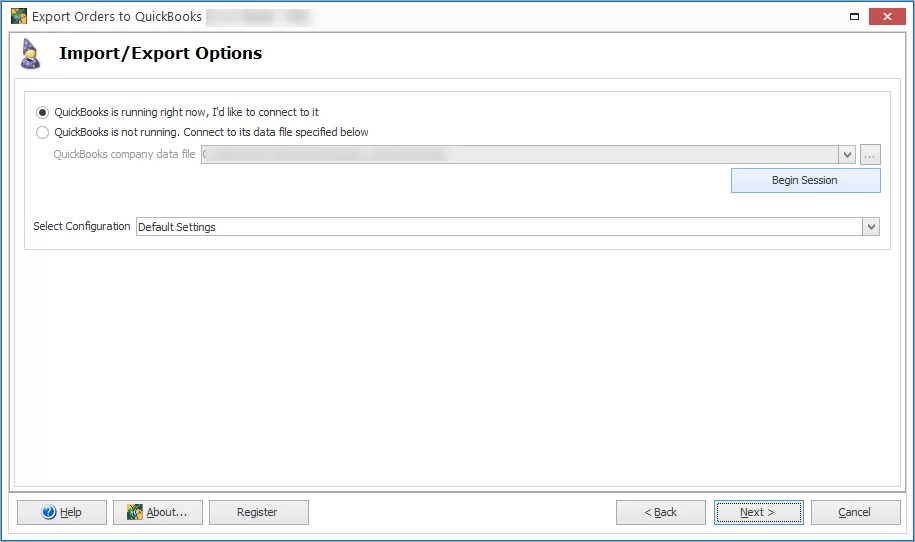
3. Establish connection between your store and QuickBooks application
If you have your QuickBooks application already running, select the “I’d like to connect to it” radio button.
If you don’t want to open QuickBooks for data transfer, just switch to the option "QuickBooks is not running.Connect to its data file specified below" and select its data file (.qbw) on your computer.
On this step, you can also see an option “Select configuration”. With this option, you can select a file with the existing export configuration and all the necessary settings would be applied automatically. You would just press “Next” to complete the procedure and thus save a bit of your time. (We will show how to save export configuration on the last step of the Wizard).
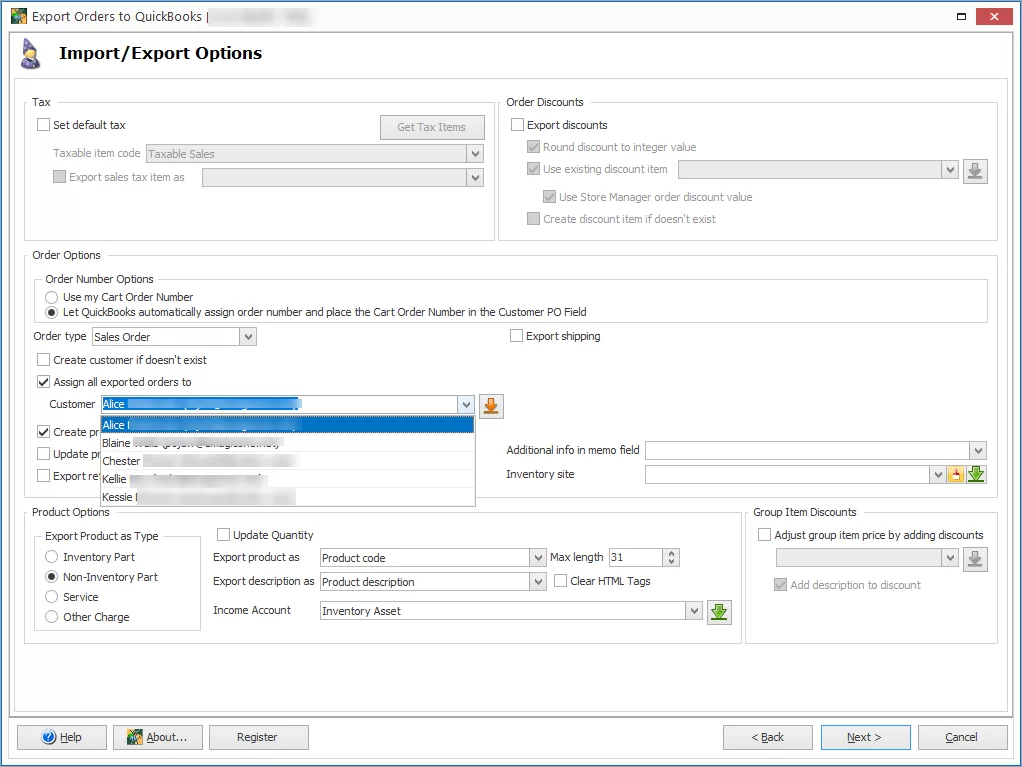
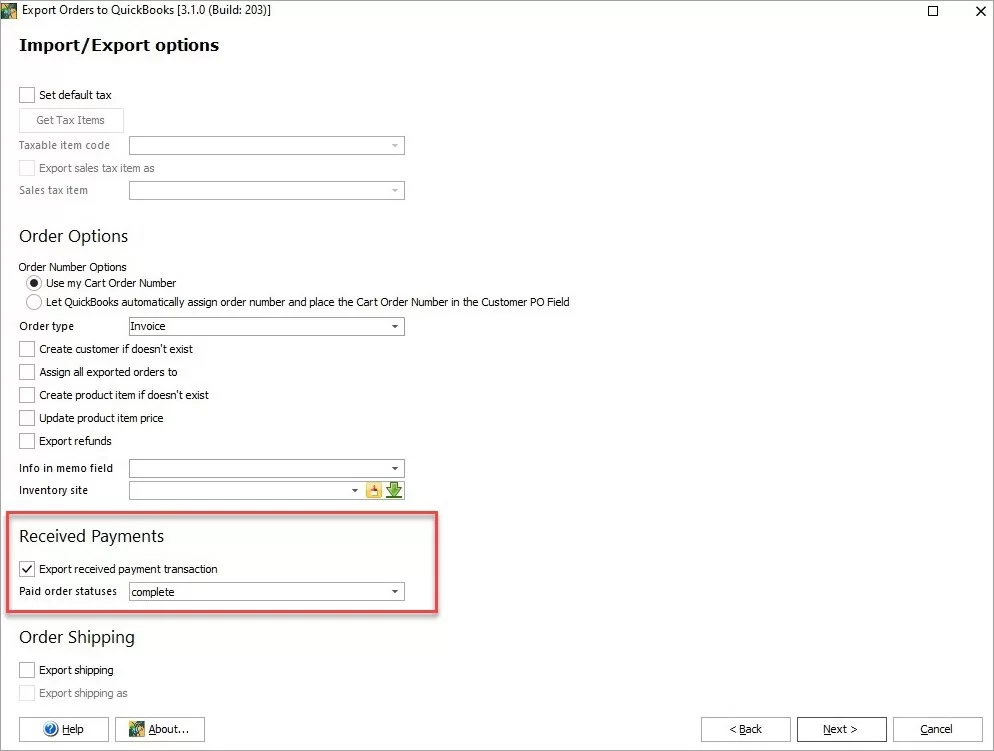
4. Specify order export options
In the Import/Export Options window, there are a number of settings which allow flexible export and save your time.
For instance, you can:
- Set default tax
- Create сustomers and product items on the go if they don’t exist
- Export discounts and shopping
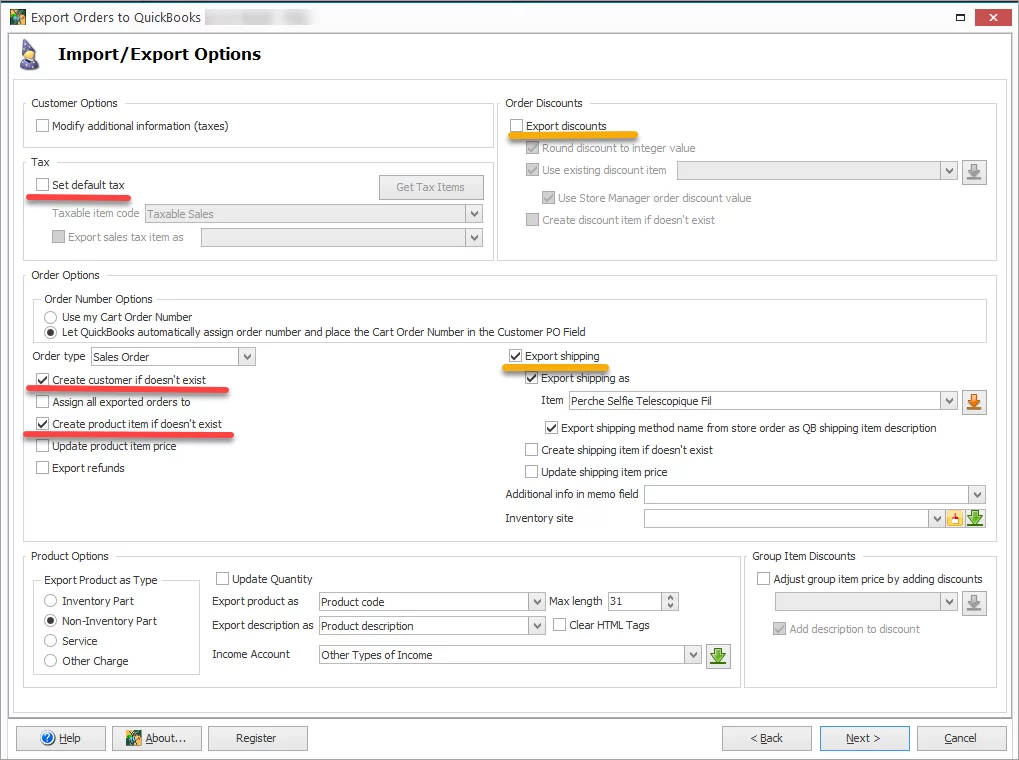
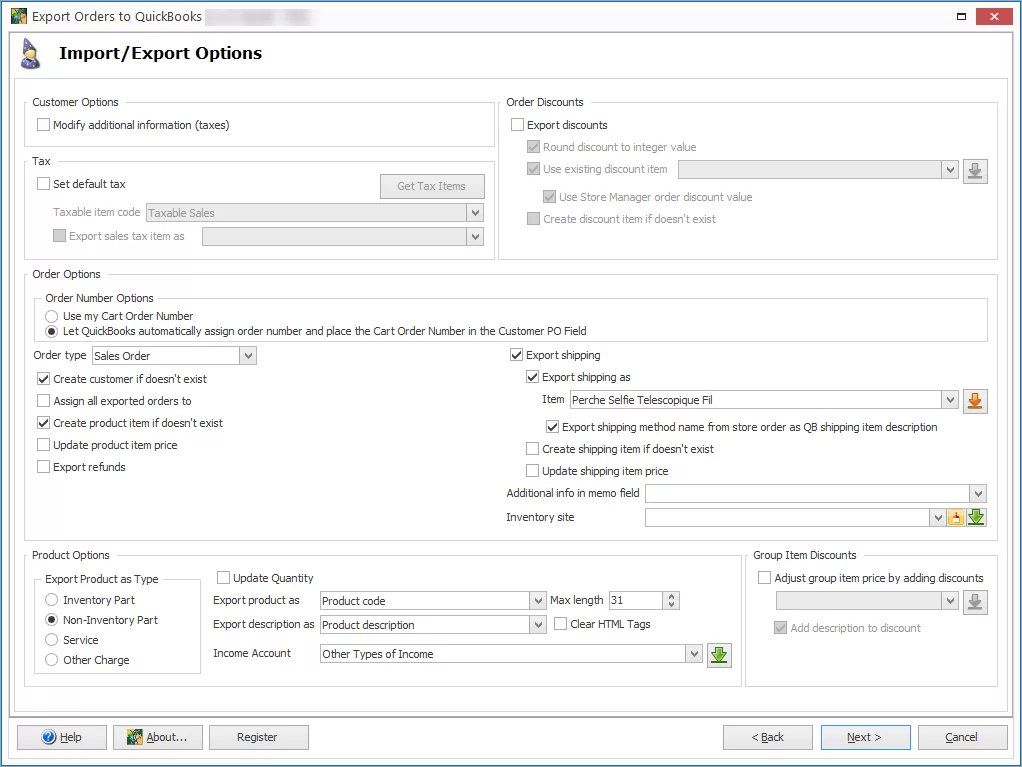
Here is a full list of options grouped by the type of entities you are going to export. An option is enabled by selecting appropriate check box:
- Customer options (modify taxes)
- Order discounts:
- Export Discounts
- Round discount to integer value
- Use existing discount items (check to select discount items from QuickBooks database)
- Use Store Manager order discount value (check to apply Store Manager orders discount values to the existing discount item during the export).
- Create discount item if it doesn't exist.
- Tax:
- Set Default tax
- Taxable item code (specify tax code that will be assigned to taxable orders)
- Get tax items (click to retrieve existing Taxes from QuickBooks)
- Order options:
- Order number options: select whether to use order number from your Shopping Cart database, or let QuickBooks automatically assign order number and replace the Cart order number in the Customer PO field.
- Create a customer if he/she doesn't exist (check to create customers on the go):
- Assign all exported orders to (select a customer from a drop-down list to assign all exported orders to him/her):
- Create a product item if it doesn't exist
- Update product item price
- Export Shipping (check to see additional options: “Export shipping as” and “Create shipping item if doesn’t exist”)
- Order type (check to see a dropdown and select whether to export orders as: Sales Order, Sales Receipt or Invoice)
- Export Refunds (if checked, shows additional options: “Refund status” and “Account receivable”)
- Product options:
- Export Products as Type (select product type from the list: Inventory part, Non-Inventory part, Service, Other charge)
- Update quantity
- Export Product as (specify which database field to export as item name: product name or product model)
- Export description as (indicate which database field to export as item description)
- Income Account (If Accounts list is empty, click the "Get Accounts" button to retrieve existing accounts from QuickBooks)
- Group item discounts:
- Adjust group item price by adding discounts (choose the variant from the list with the items with the assigned discounts)
- Add description to discount
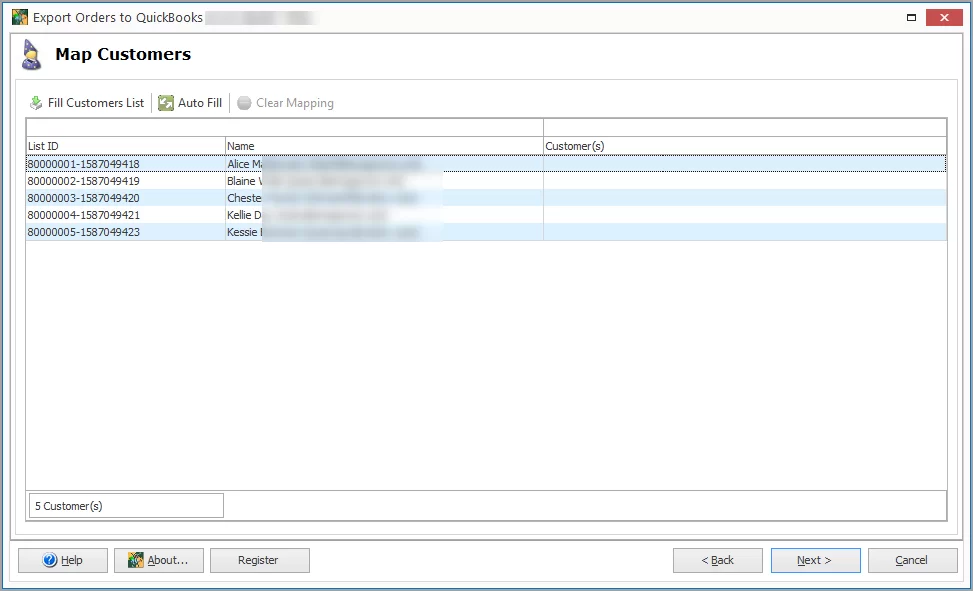
5. Map customers from your store to QuickBooks
Now you should map customers from your WooCommerce store to the customers in QuickBooks. Press the “Fill Customers List’ button to get or refresh the list from QuickBooks. Then click “Autofill” to map customers automatically:
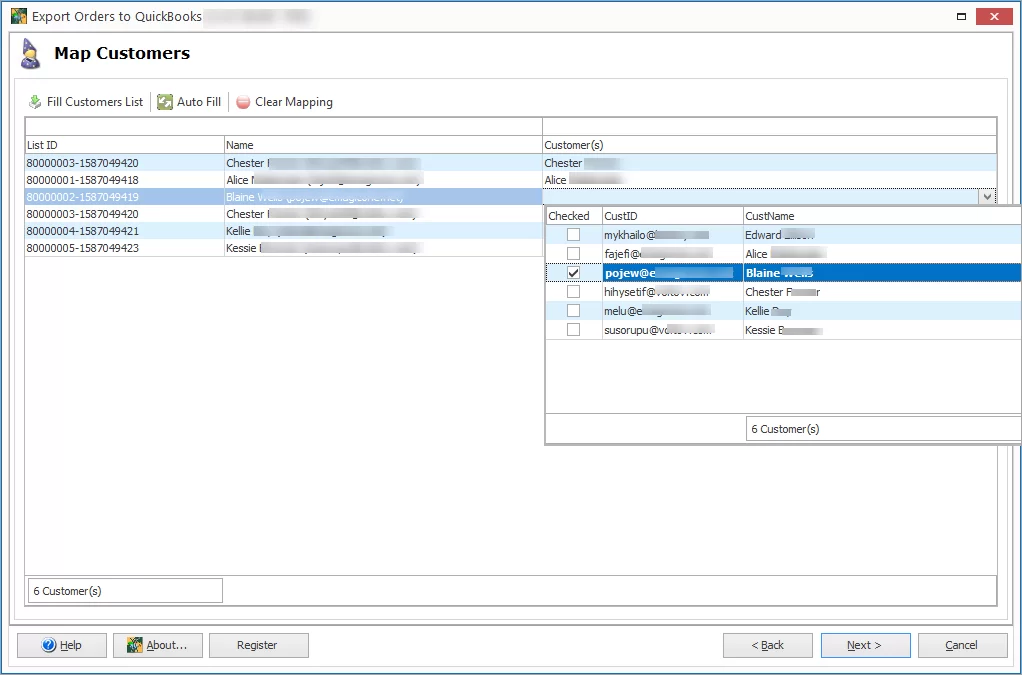
If you need to assign a customer manually click on the cell and select a customer in the drop-down list:
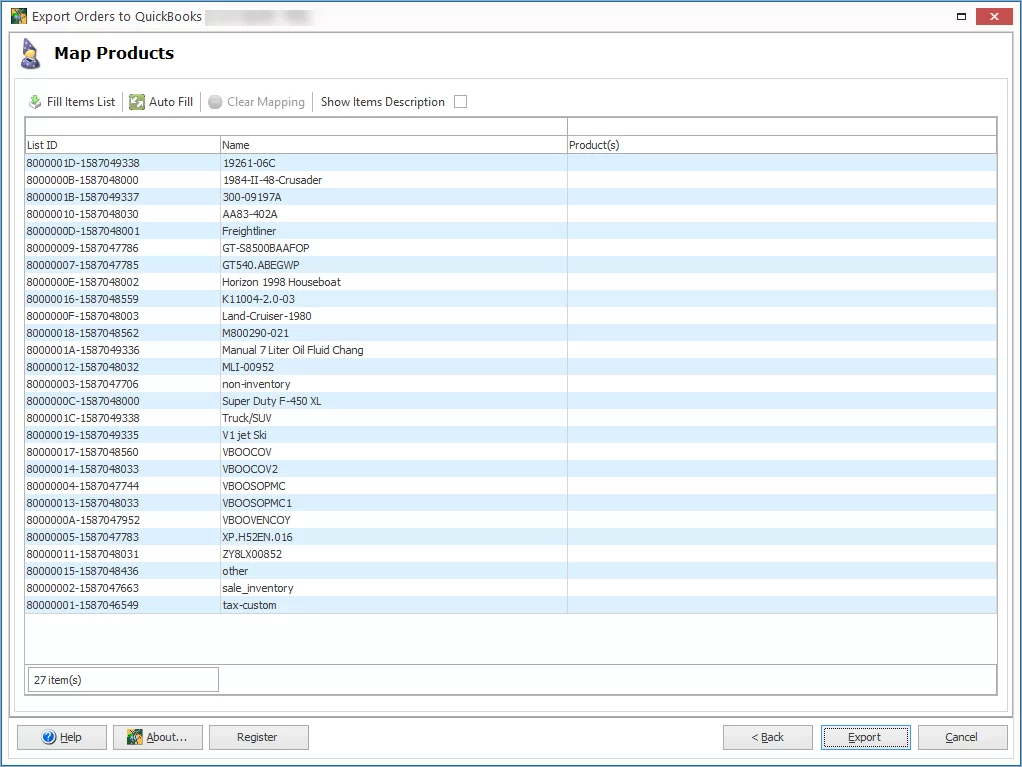
6. Map products
On this step you should do the same mapping for products. This is the last step of the wizard. If you press “Export”, orders will be transferred to QuickBooks:
7. Perform the export and check orders in QuickBooks
Finally you will see the details of the performed export: customer name and order number.
On the last step, you can save current export configuration and just load it next time you need to export data:
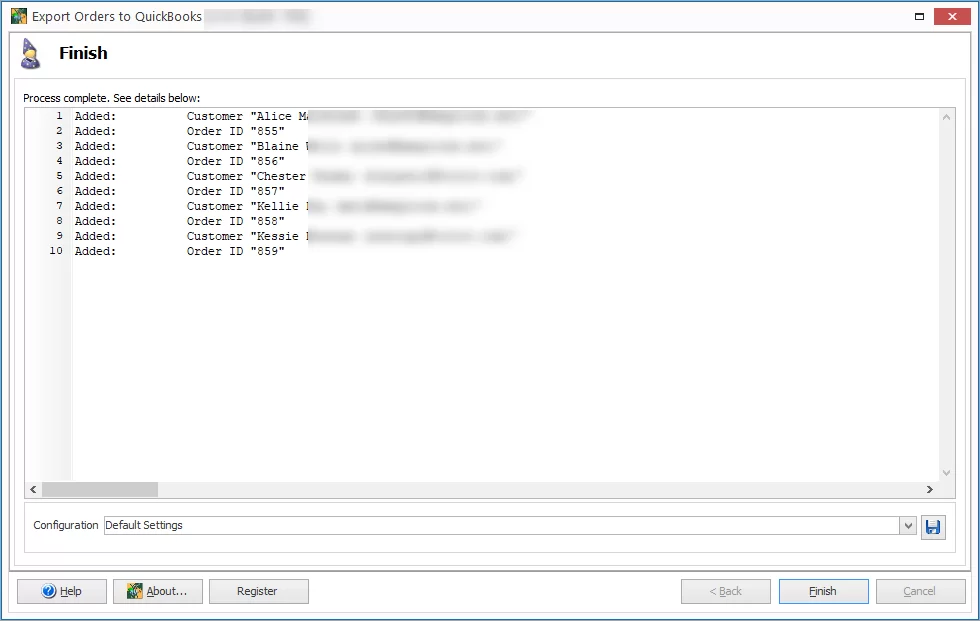
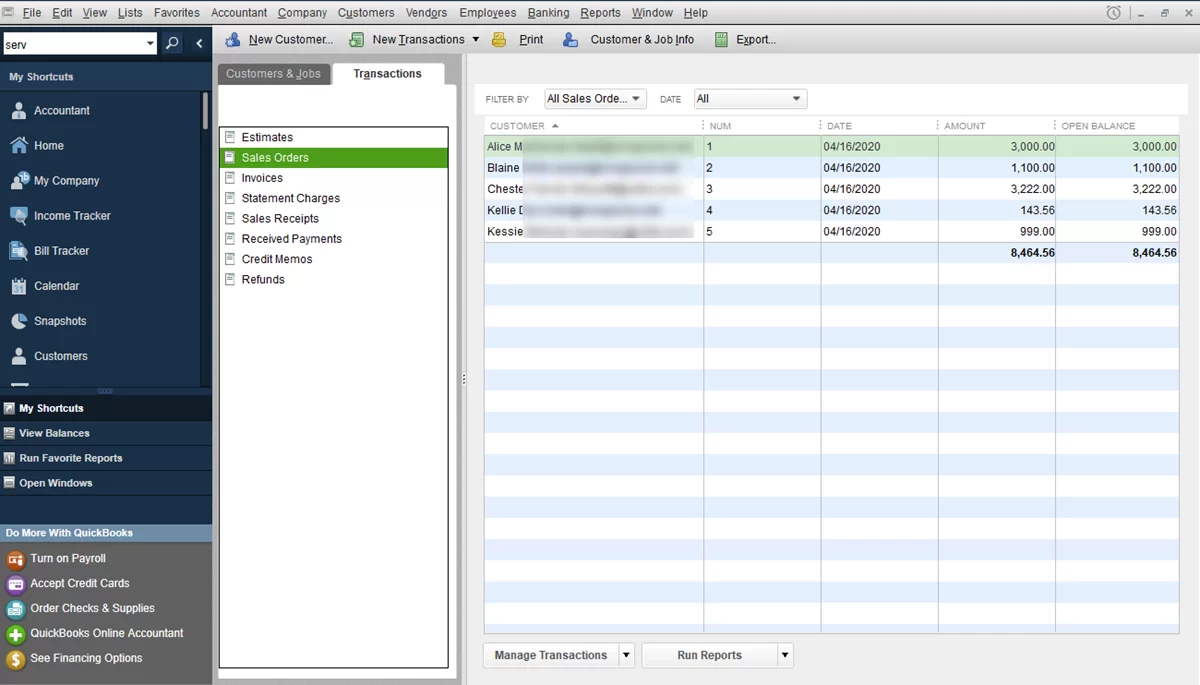
Now you can check your orders in QuickBooks. As you can see, orders for 5 customers have been successfully exported: