Manage WooCommerce Custom Reports
Store Manager for WooCommerce owns and offers different types of WooCommerce reporting for convenient store analysis, starting from best products to sales by date. That is an essential part of store management, as having up-to-date reports shows your shop performance and helps to focus your attention on main aspects when making your business strategy.
Here we will get acquainted with WooCommerce reporting more closely and go through the steps of report creation.
In order to start working with reports, go to the corresponding section on the toolbar.
The section contains Custom Reports and Order Report Development tools.
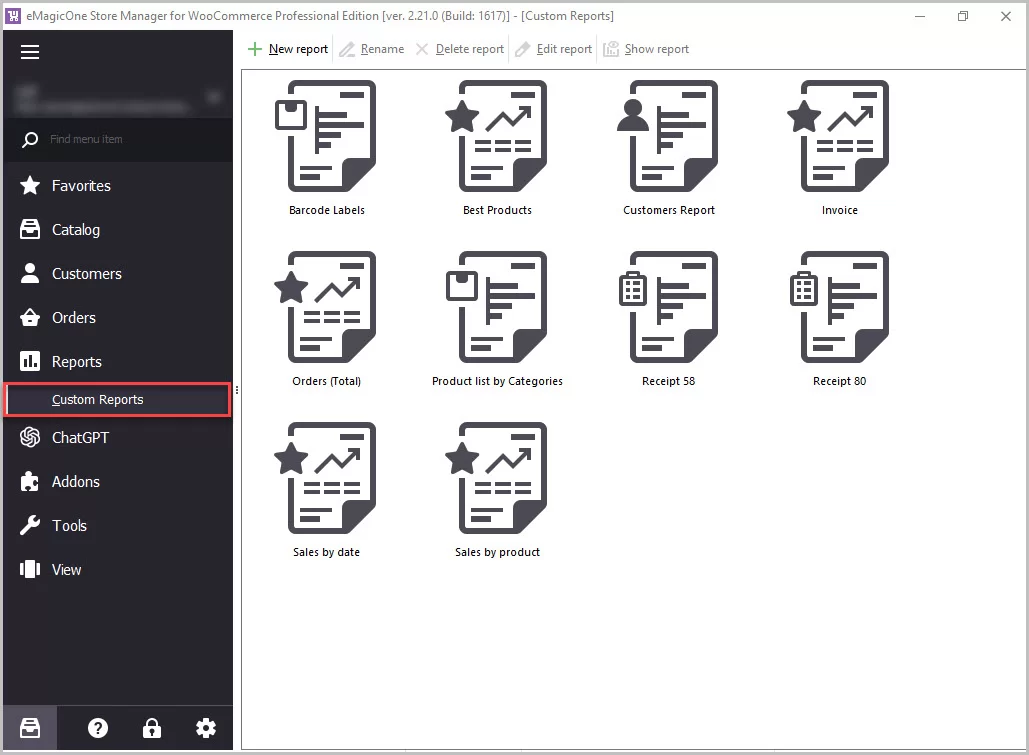
Custom Reports contain all the available reports on the page (the application has ready-made reports users can take advantage of for their purposes). If you want to designate a new report, specifying your own requirements and organize the information the way you need - you can create your own WooCommerce custom report.
The buttons on the toolbar allow you to perform the following actions over WooCommerce reports:
- New report - allows you to create a completely new one;
- Rename - if for some reason you would like to change the name of the report you already have;
- Delete report - remove the document if you do not need it anymore;
- Edit report - modify the needed report, selected from the list;
- Show report - review the chosen document.
Edit Existing WooCommerce Report
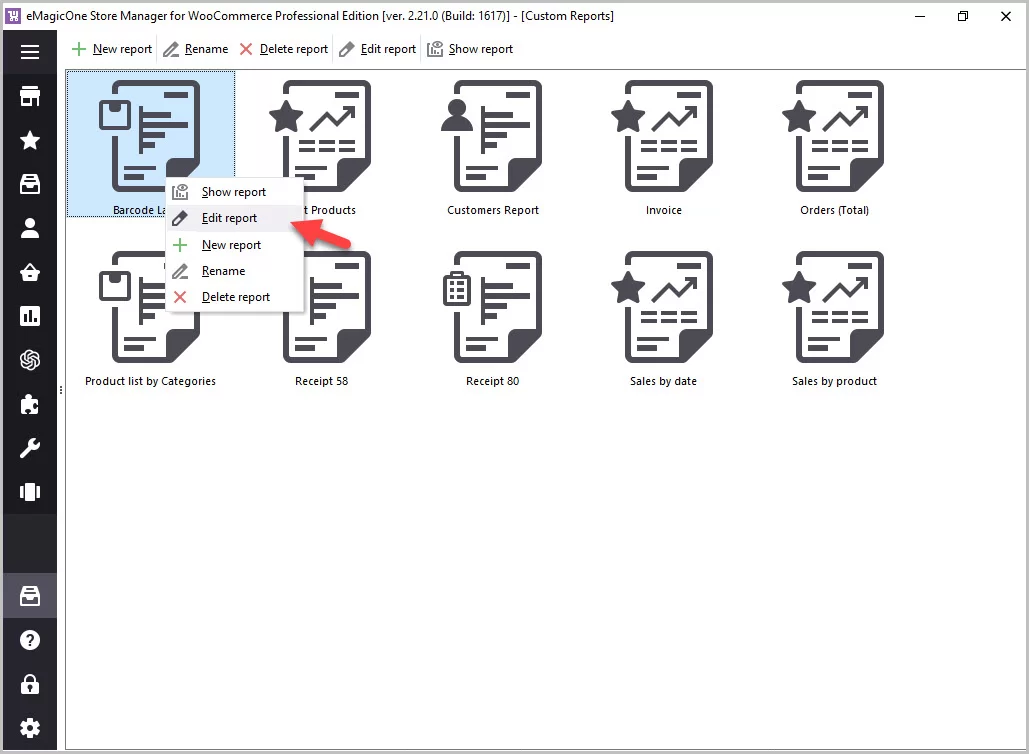
The documents you receive with the installation of Store Manager are available for usage and can be modified according to your needs. For example, let’s take a Barcode Labels report. Let’s say, you want to change the code, your barcode labels will be generated from. For this, press Edit report button from the context menu on the highlighted document.
You will be transferred to the technical part, SQL Editor with the statements that retrieve the needed data from the tables for your report. You need to move forward to Report Designer tab.
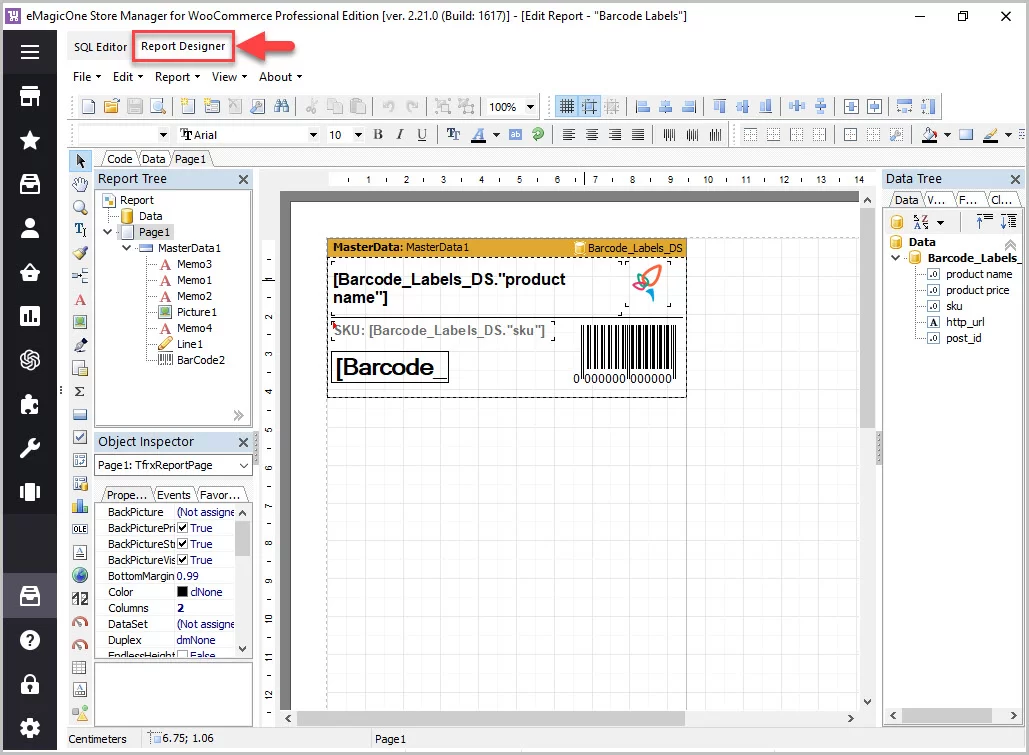
Choose the barcode label and double click on the barcode.
Press the “fx” button in the Code option and select the needed identifier from the Data tab. Designate the barcode depending on your requirements in Type of Bar, Options and Rotation.
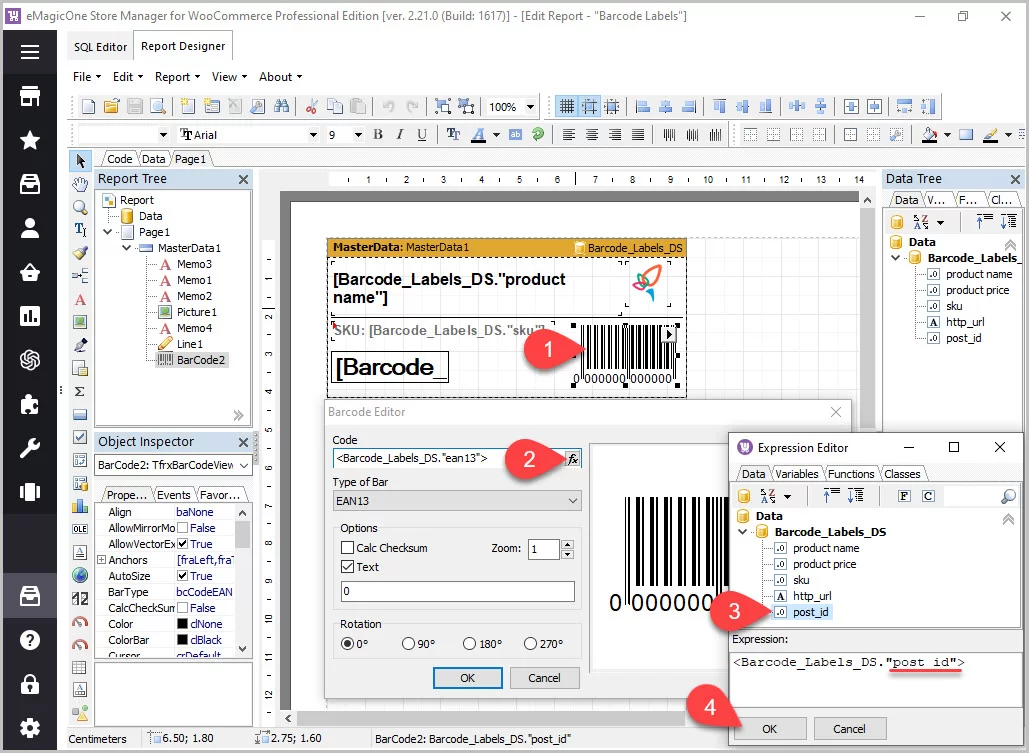
When you are done with the settings, confirm your actions with the "OK" button.
That’s it! You can check the result in the Report Designer tab, or hit Ctrl+P to preview the edited report. Onwards, you can save or print ready-made barcode labels.
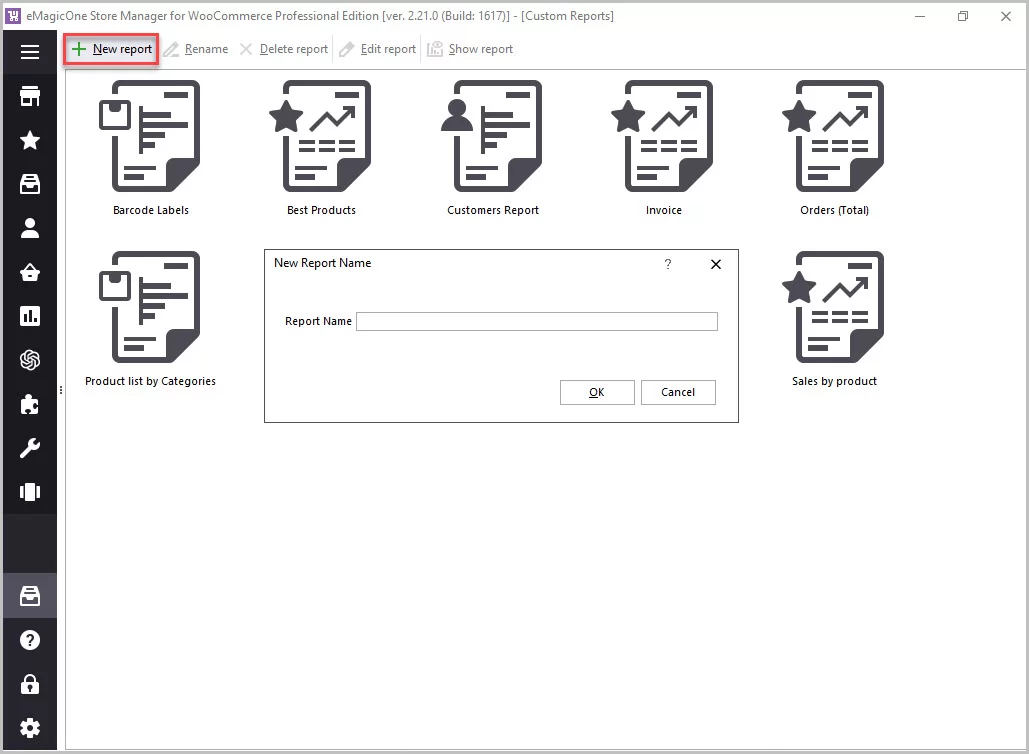
Create New WooCommerce Custom Report
After pressing the appropriate button on the toolbar, proceed with filling in your future report’s name.
Once you specify its name, you will be directed to the next step of WooCommerce report creation.
In the SQL Editor tab, select whether to add New SQL Query or Open Query From File.
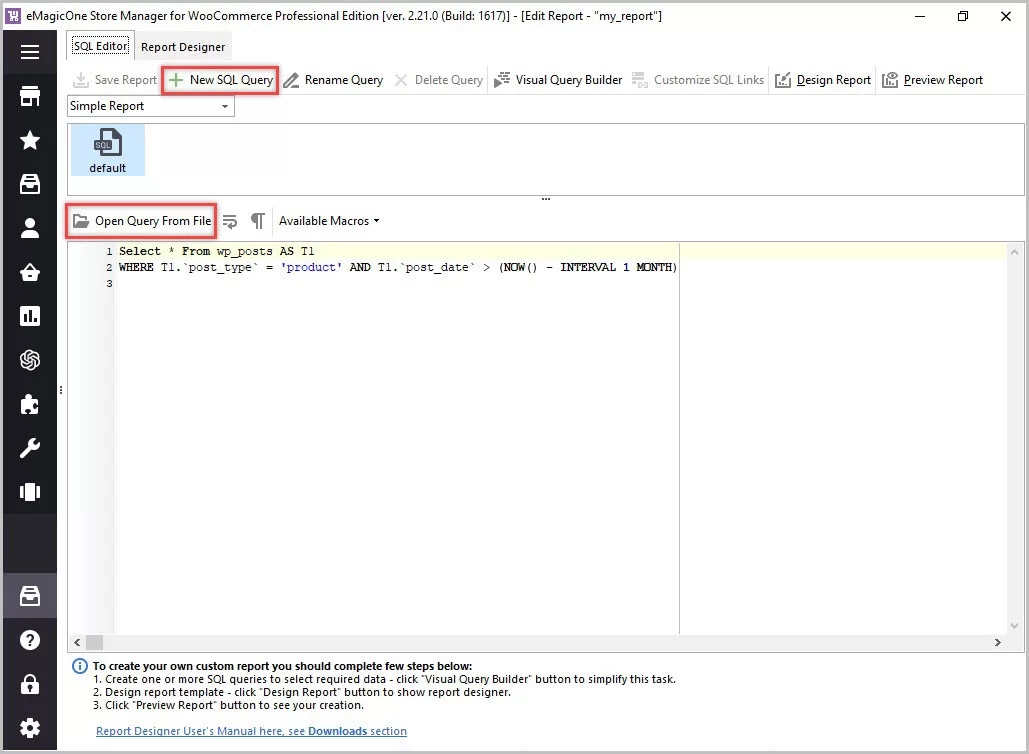
You can use Visual Query Builder to simplify the statement writing and fall back upon the "Run Query" option to verify the formula.

Once you are done with the SQLs, you can proceed to Report Designer to create the template of your future document.
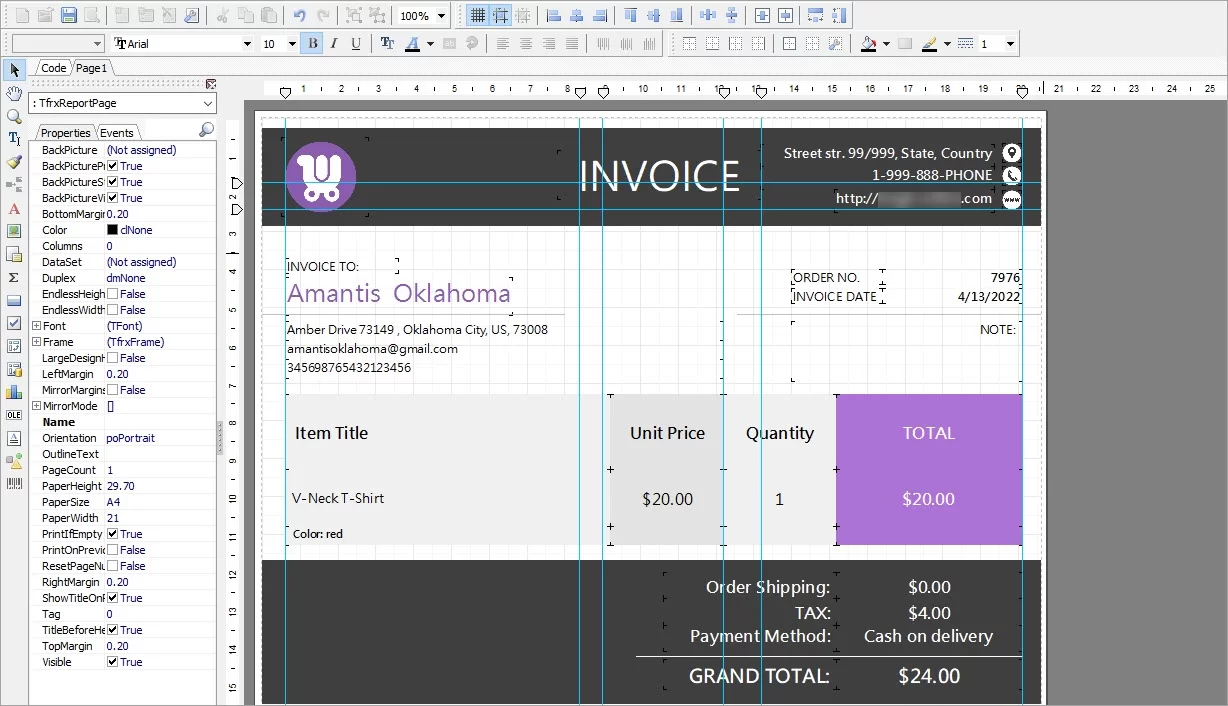
For instance, firstly, let us add a new band - Report Title, which will indicate what your WooCommerce report is about. You can do it on the left pane, go to Page1 ---> Insert Band ----> Report Title.
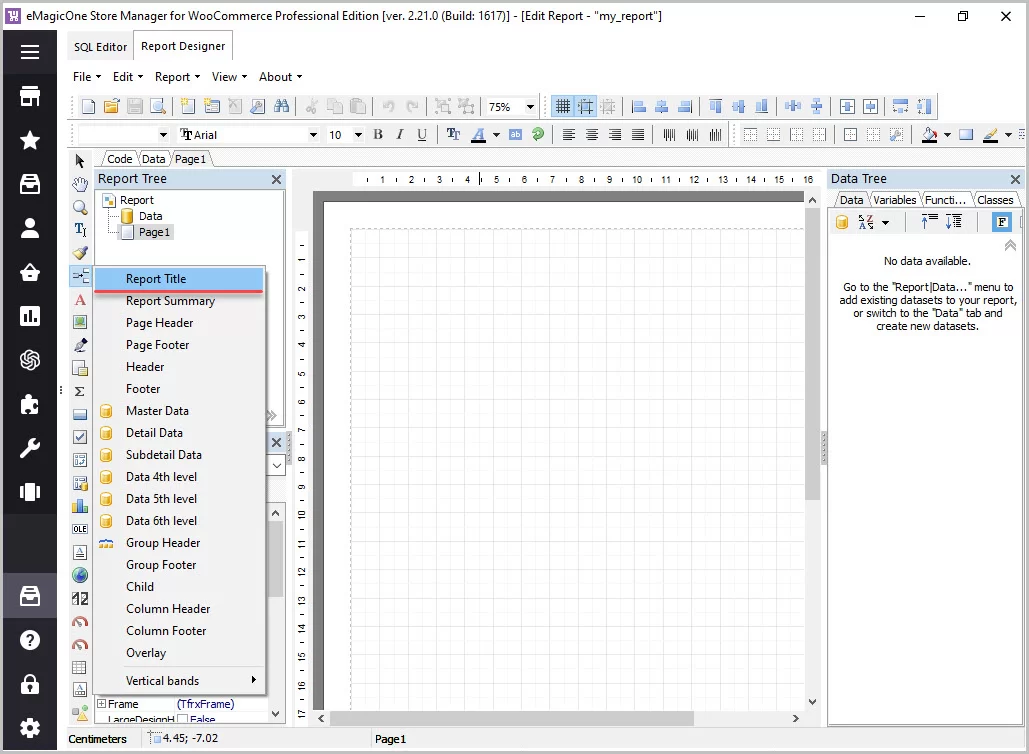
Drag the appeared square along the document where the title will be located.
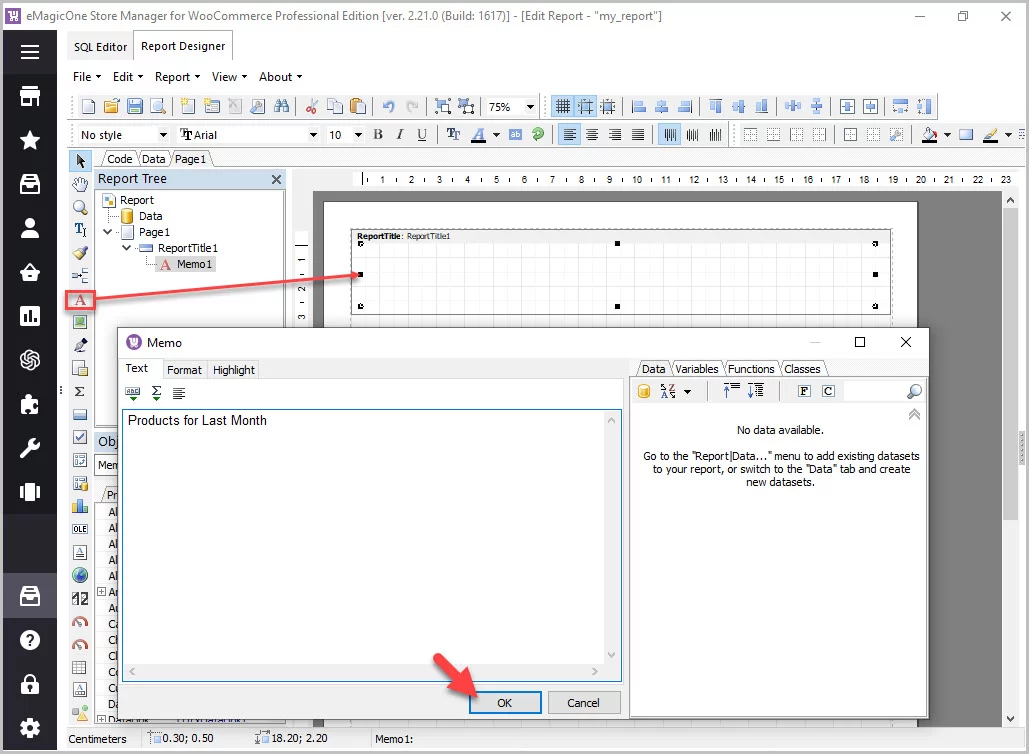
After that, select Text object in order to insert the text your title will contain, the name of the WooCommerce report. Designate the text size, color and other parameters, available at your disposal on the toolbar.
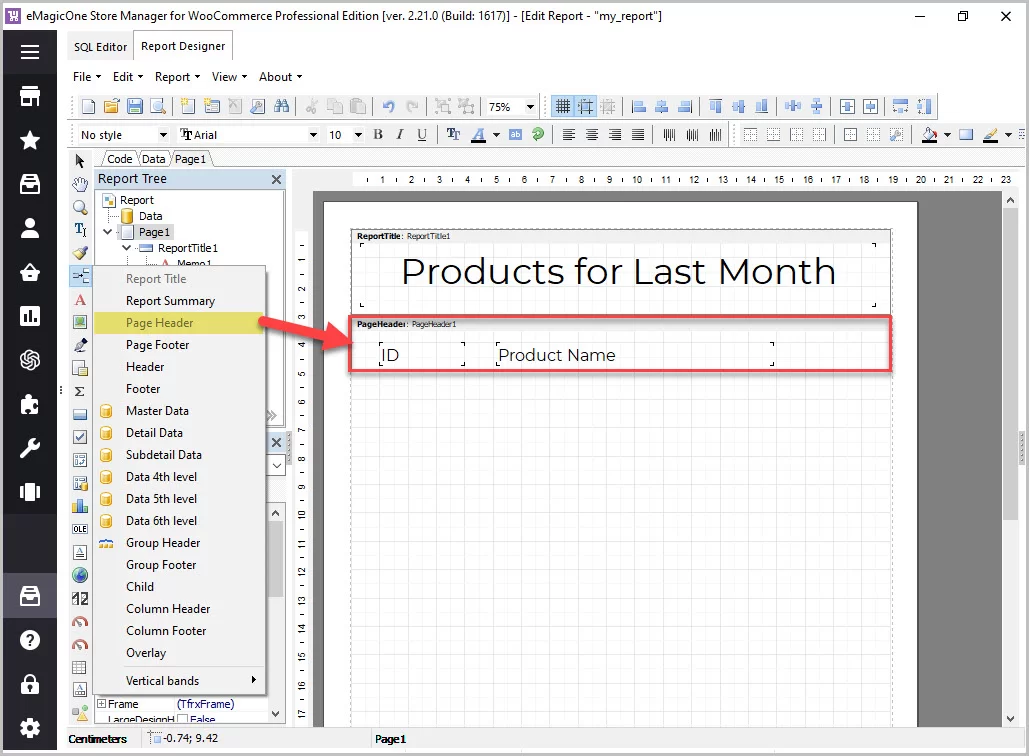
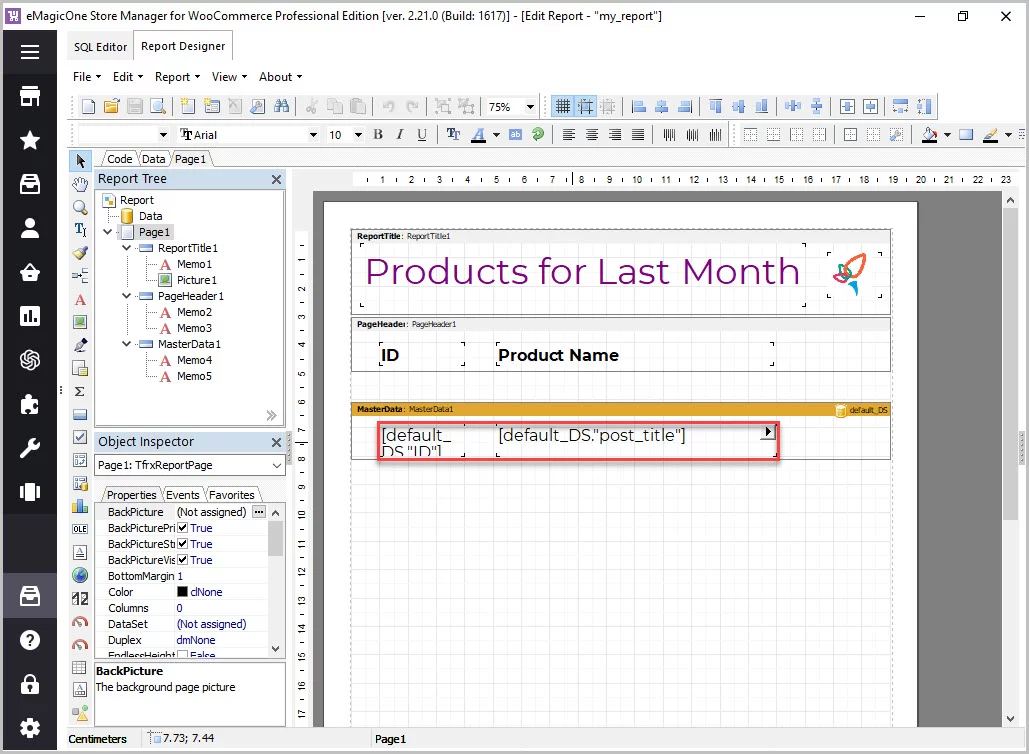
Another band we will add is Page Header, that contains the names of the columns with data in our document. For instance, we choose the text objects with "ID" and "Product Name".
Now, let us add a company logo in the right corner of the report. For this, select Picture object and place the frame, where the image should be located. Click on the folder icon and choose the picture, previously saved on your PC.
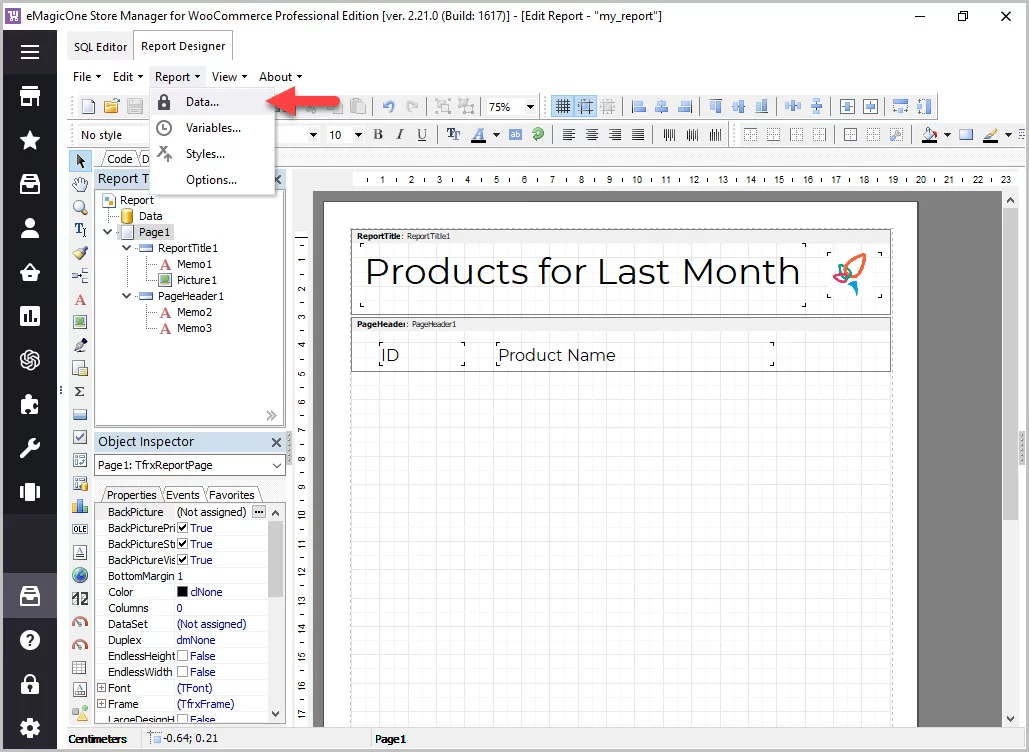
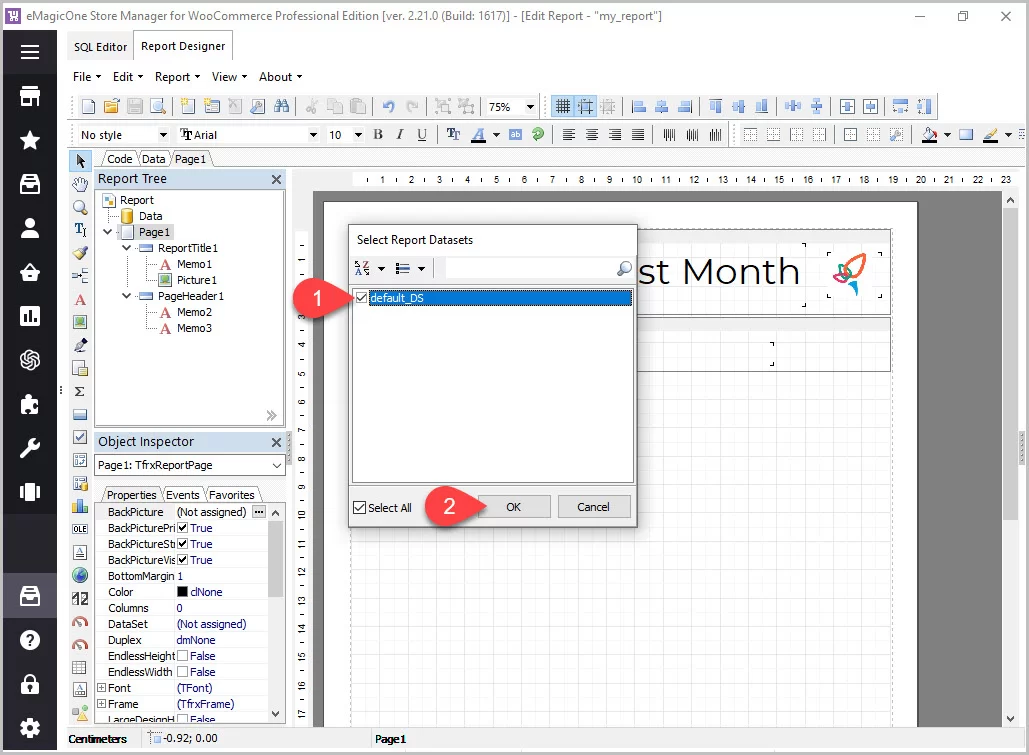
Further, we are going to add the Master data band, to fill in the report with the needed data values. Before you start creating it - go to Report option on the toolbar, choose Data... from the dropdown and select the dataset your information for reports will be extracted from. Once you have ticked the needed box - apply changes with "OK" button.
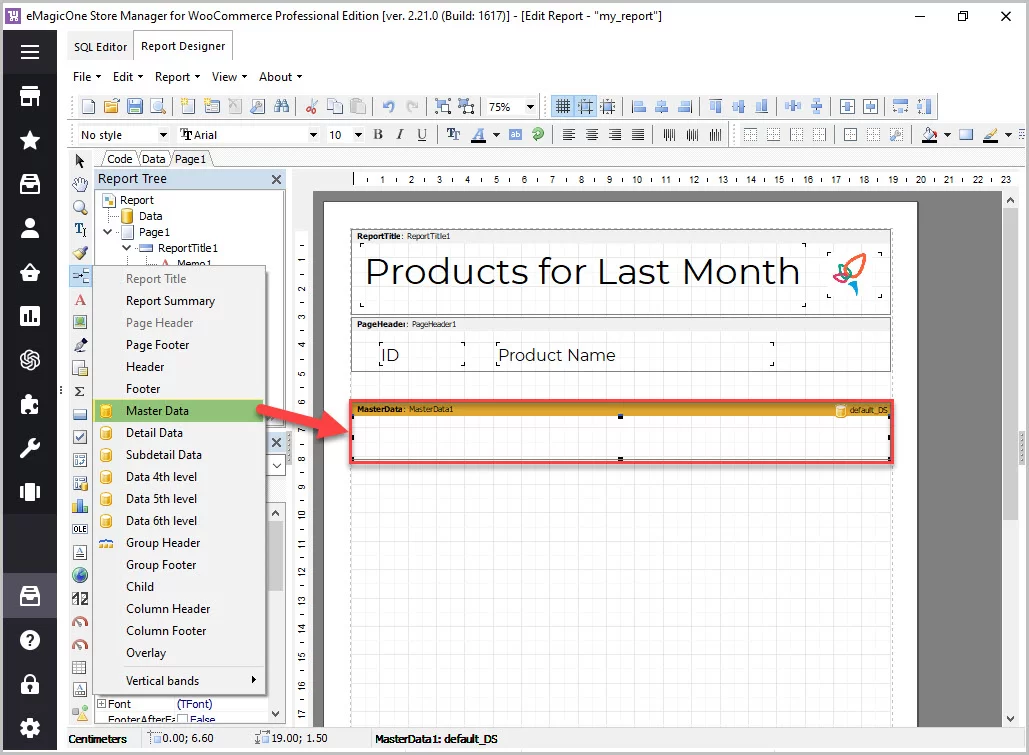
You can add Master Data the same way you added the previous bands. Pick the dataset the information will be taken from and specify the number of rows your report will contain.
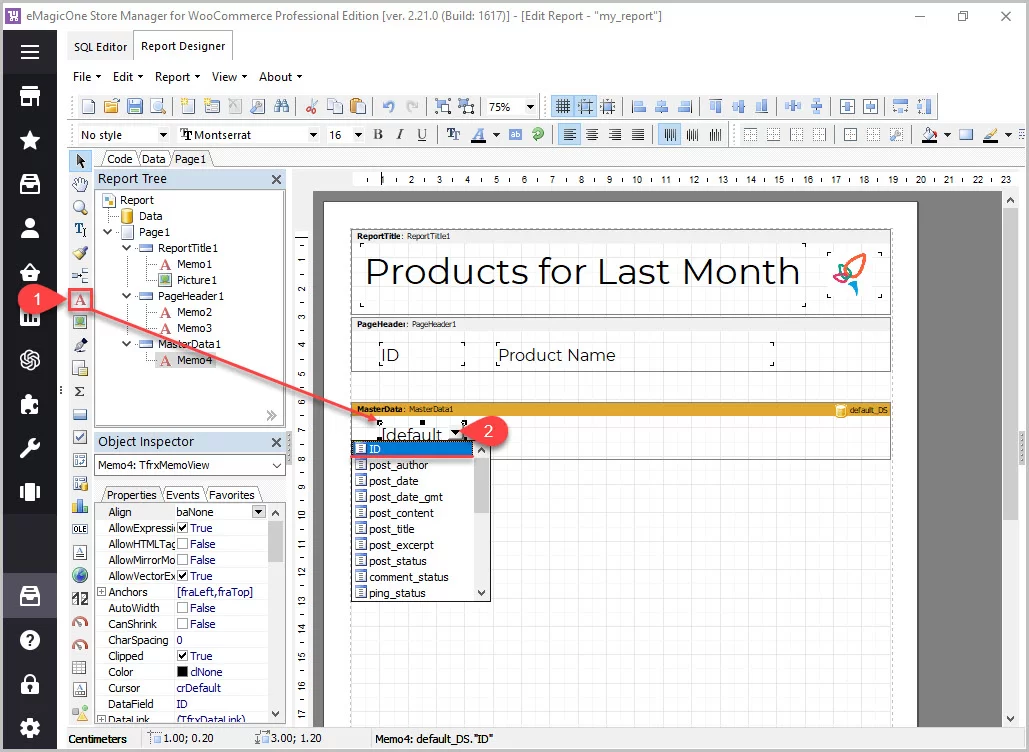
After that, insert the text object and choose the arrow button in the text area. There, select the table, data will be extracted from (in our case, it is ID). Alternatively, you can double-click on the text object and in the opened window, choose Text tab ---> ABC → Expression Editor ---> Data, choose the ID table.
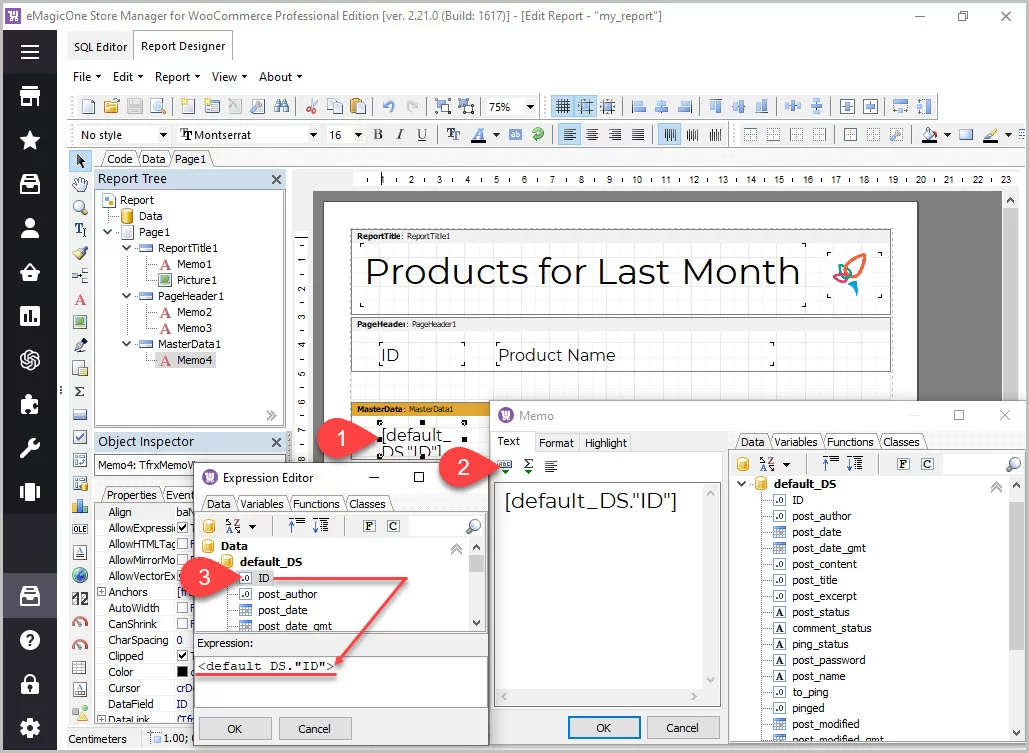
The same way, we add the "Product name" column.
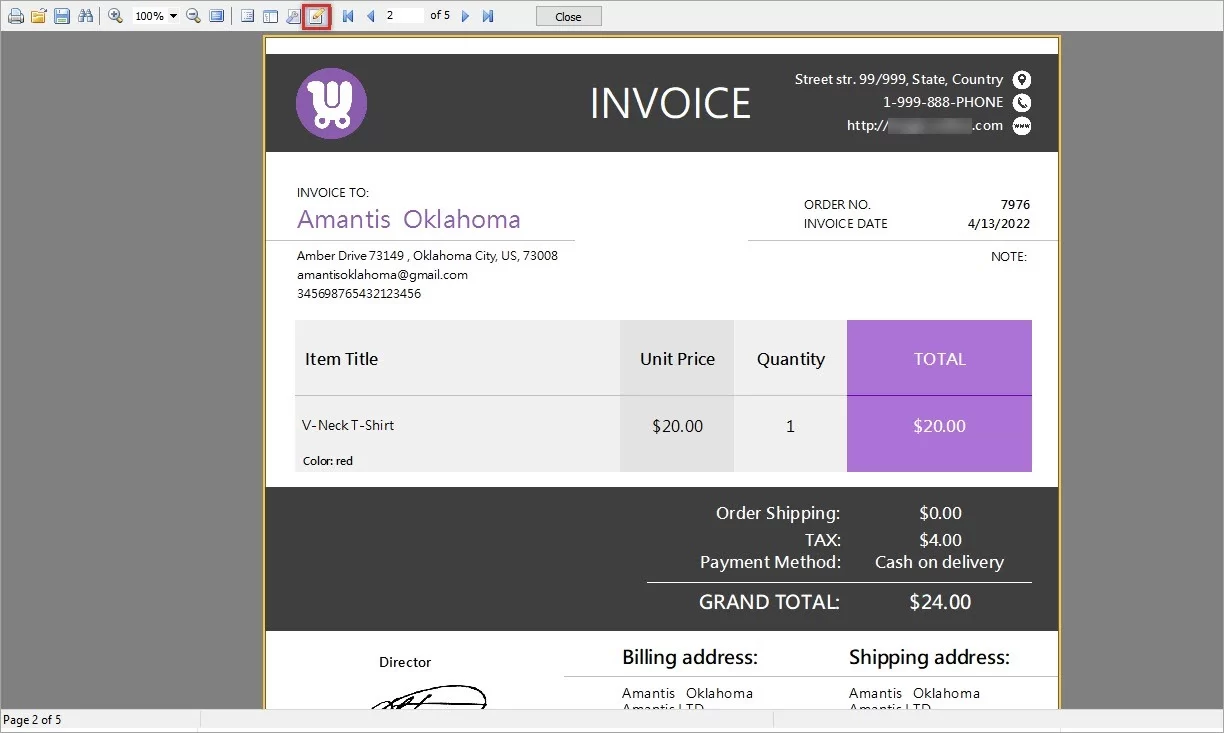
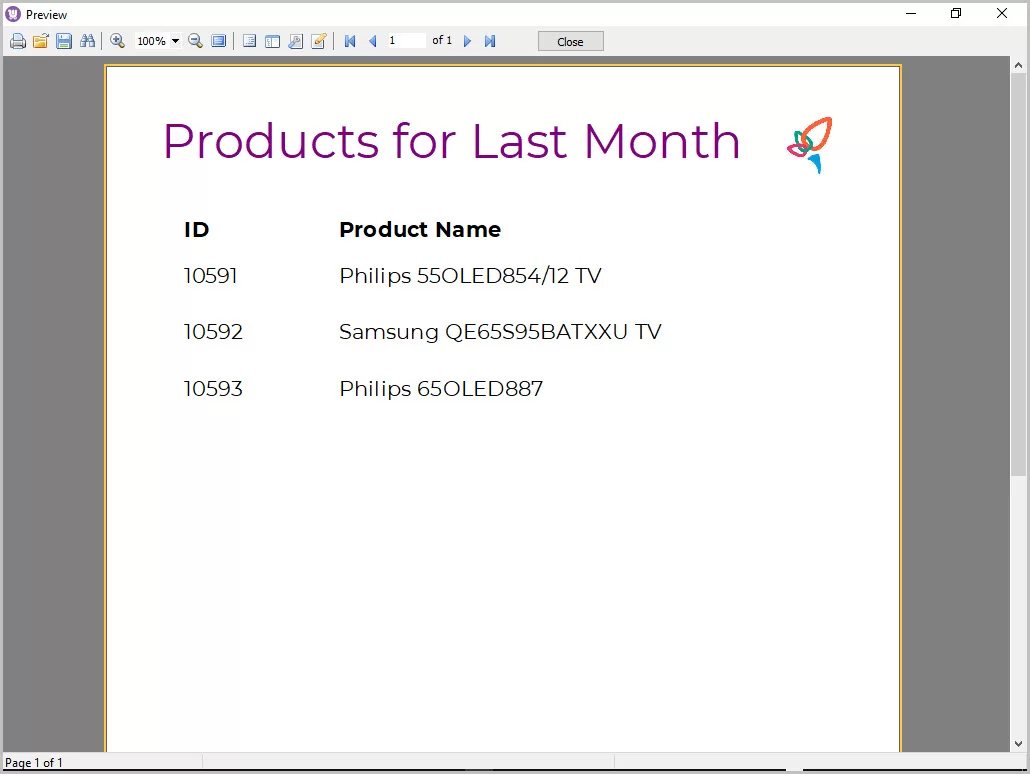
When you press the "Preview" button, you will see the result of how the part of the report you have created looks like.
Next, you can proceed with additional bands, depending on your needs.
Store Manager allows you to work with s third-party tool to create WooCommerce custom reports - FastReport tool. Here you can check the manual how to fill in the necessary information to create your own document - https://emagicone.com/shared_files/FR4.6.UserManual-en.pdf
Once your report is ready, save, print or specify additional settings, available with the buttons on the toolbar.
Want to make the report that will meet your needs best - we are glad to assist you! - https://woocommerce-manager.com/useful-articles/woocommerce-order-management-tutorials/woocommerce-custom-reports/