How to Import Orders in WooCommerce
Adding or updating order information manually may take too much time. To assist you with such problem Store Manager offers the possibility to import orders to WooCommerce as a CSV file.
In combination with order export function WooCommerce order import simplifies overall order management and orders update in particular.
In order to carry out WooCommerce order import from a CSV file into Store Manager, perform the following steps:
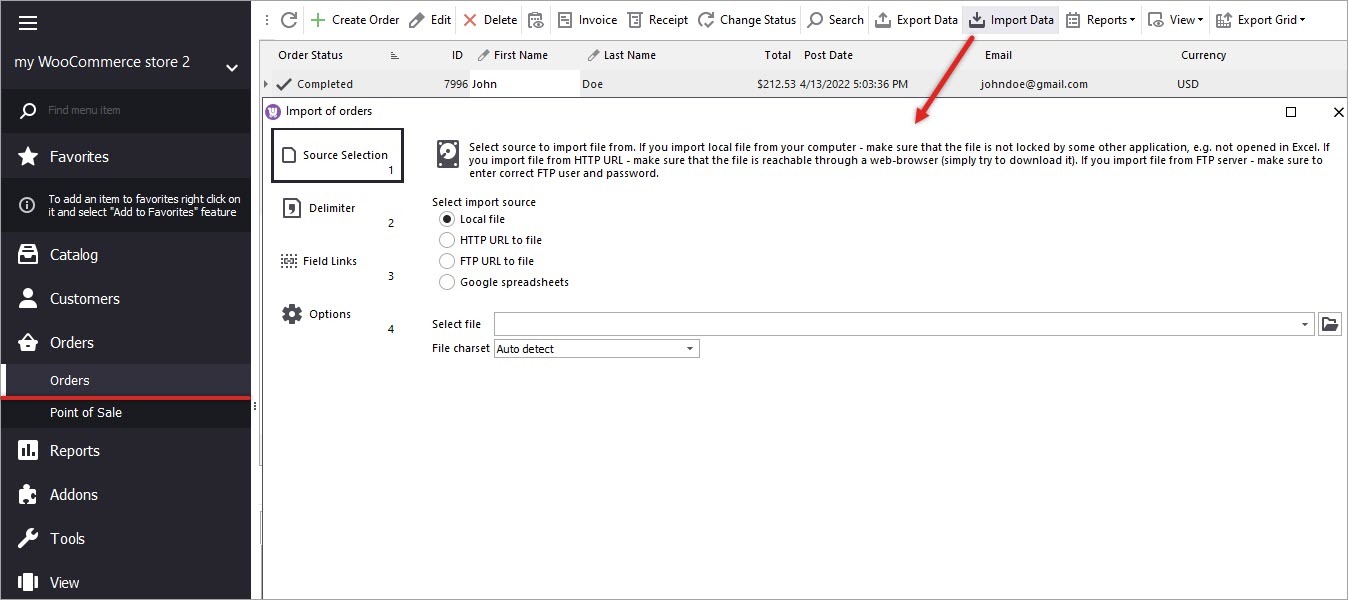
- Select 'Orders' on the main toolbar and after that press 'Import Data' button. There will show up a wizard to guide you through the order import process.
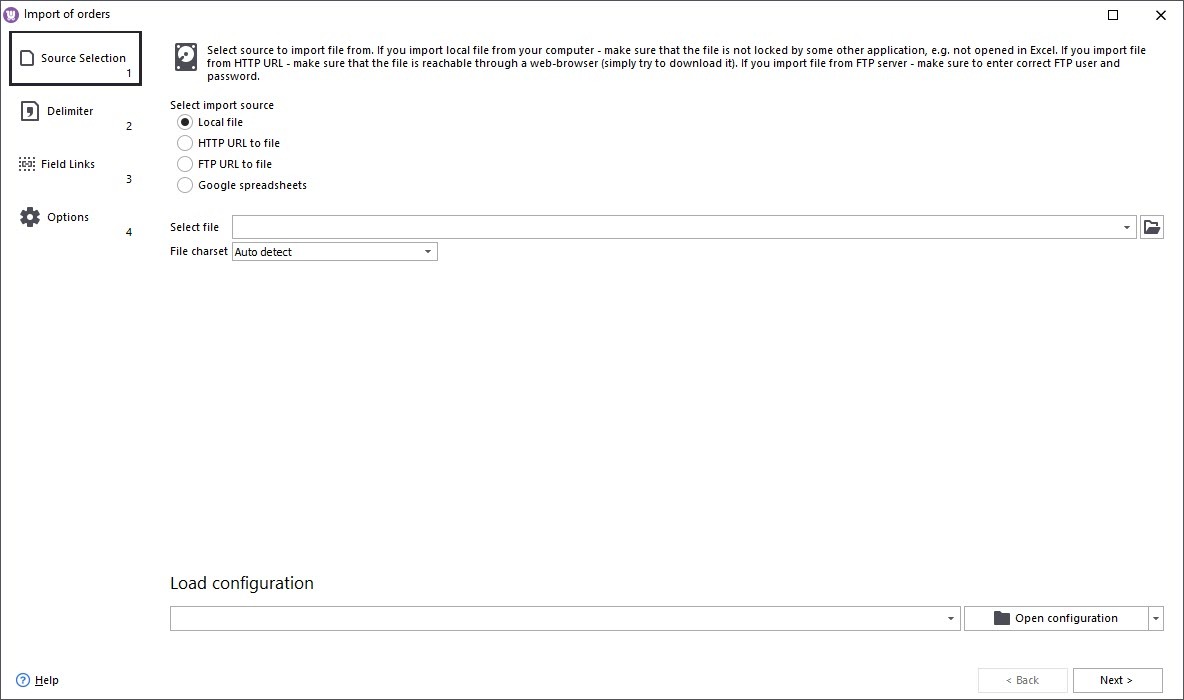
- Select import source from the list offering local file, HTTP URL to file or FTP URL to file. Afterwards select the file you wish to upload and specify file charset. In case you have a ready configuration, you can load it using 'Open Configuration' dropdown.
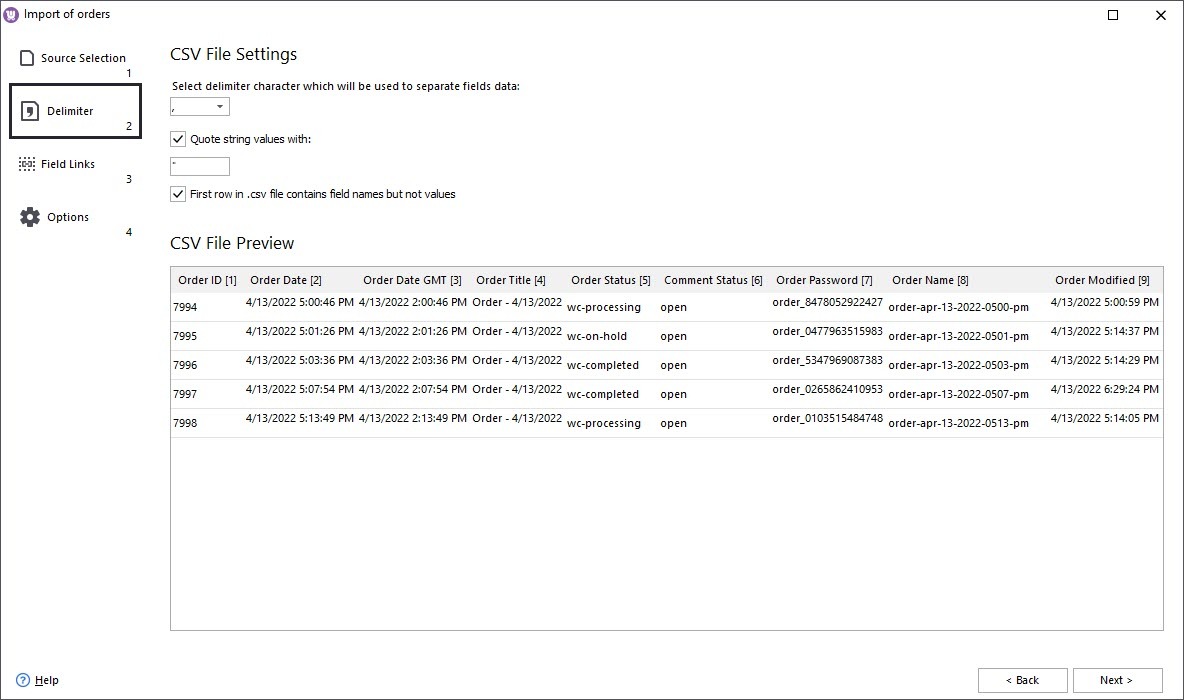
- Select delimiter to separate fields data and then preview the CSV file.
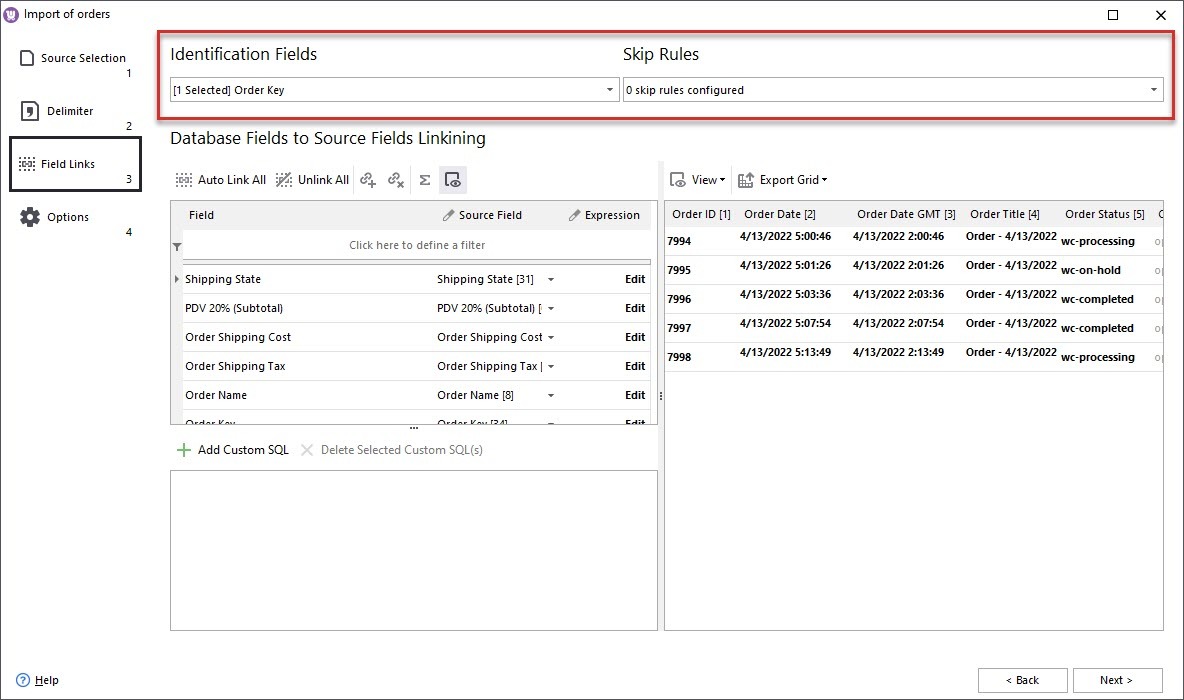
- Specify identification fields and add rules to be skipped during the WooCommerce order import using the corresponding dropdowns.
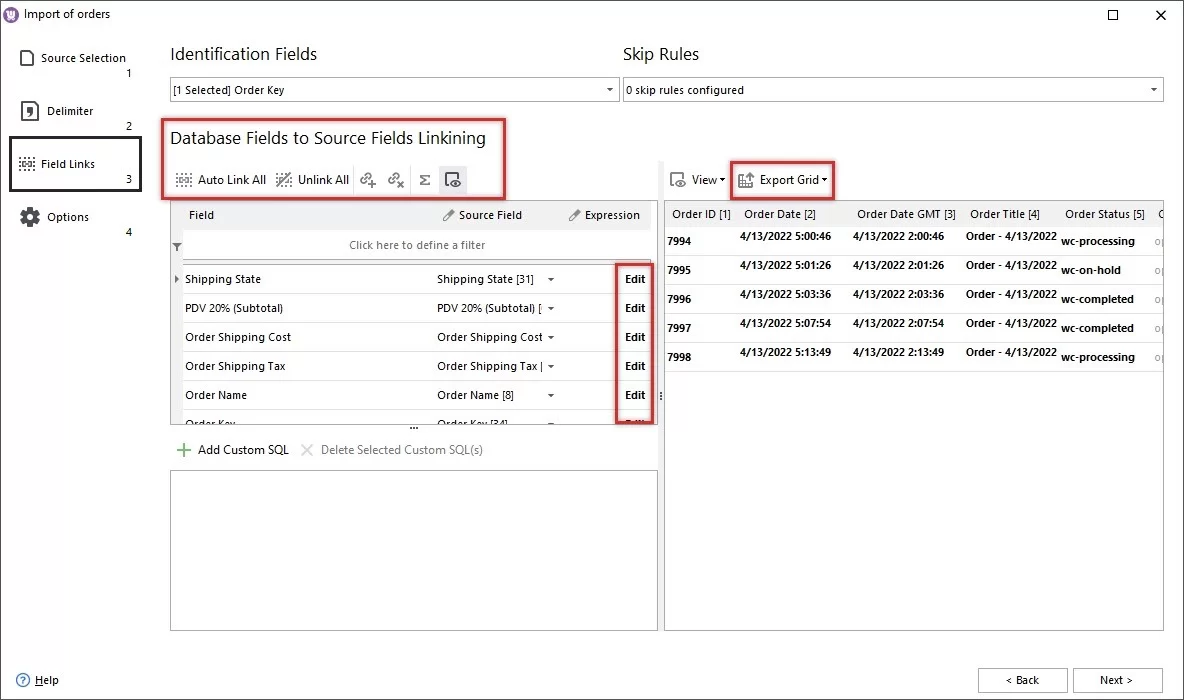
- Assign database fields to source fields. You can automatically assign all fields or only selected ones or add custom SQLs. If you need to edit the expression fields, find ‘Edit’ button in the line with expression to be modified. It is also possible to export CSV file grid to .html, .xml, text., .csv, .xls or .xlsx file.
- Select the import method:
- add new orders and do not change the existing orders;
- add new orders without searching the existing ones.
In order to modify date and time format settings, press 'Show advanced settings'. If you changed them and the import did not proceed well, return here and correct the settings or leave them as they are.
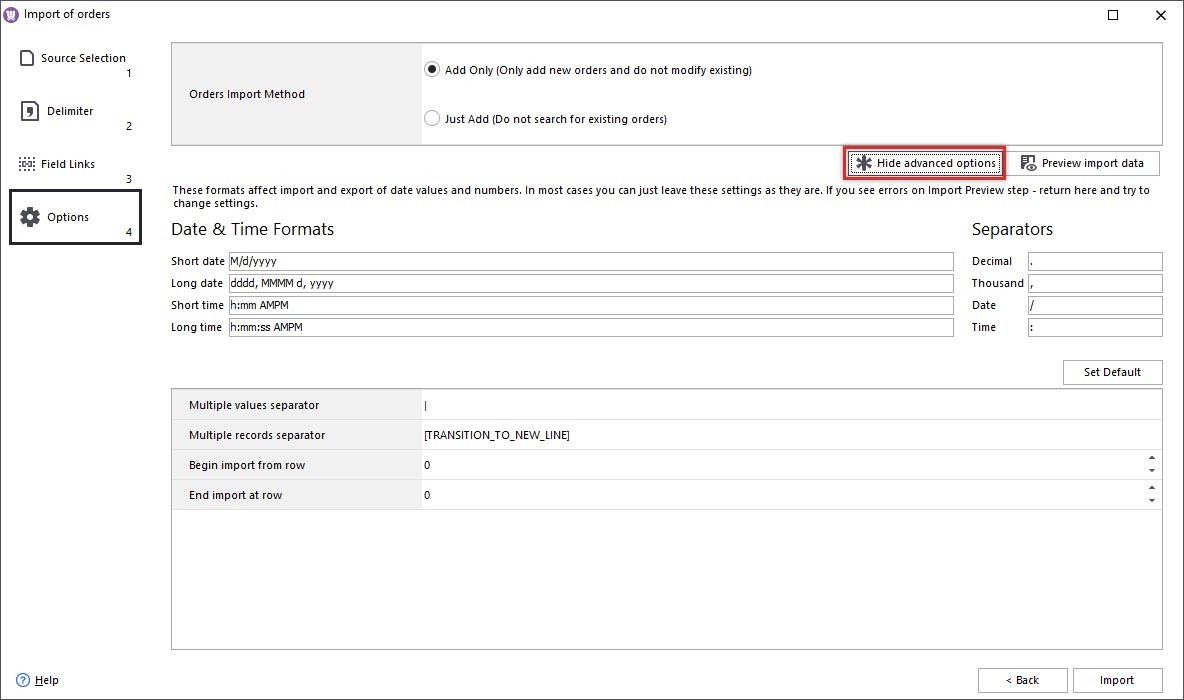
WooCommerce Orders Import Options
- If you are sure to check all options, press 'Import [Page Down]' and move to the final step.
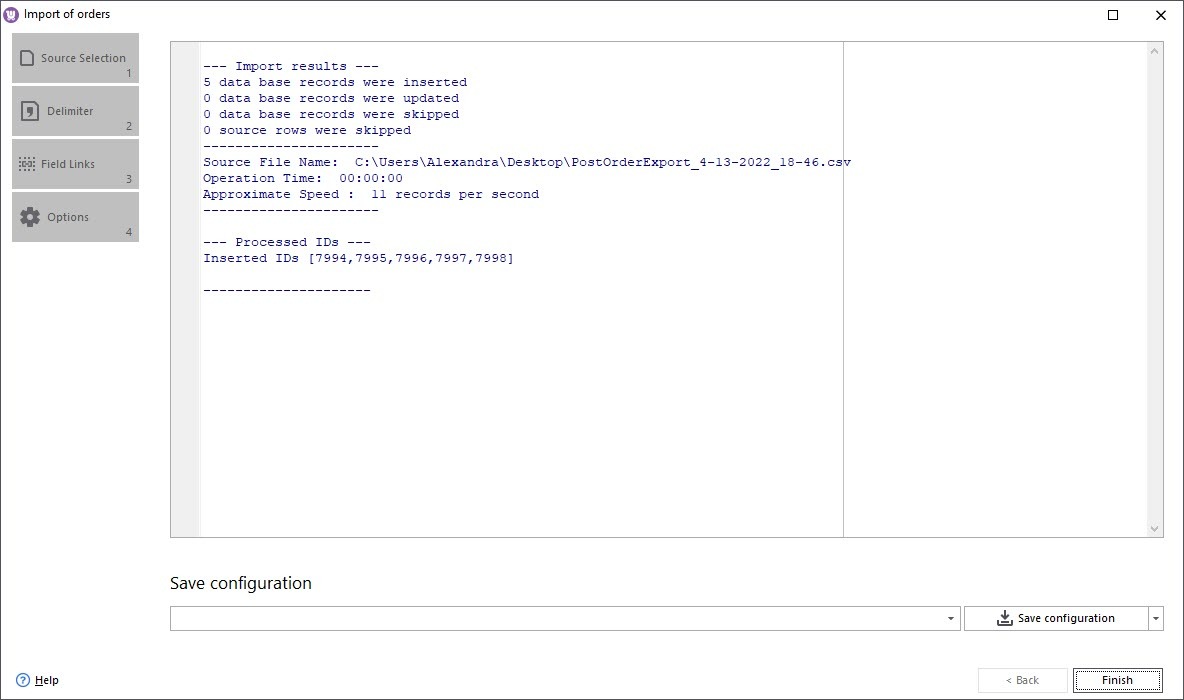
- Preview the import results and save the configuration if needed. Press 'Finish [Page Down]' to complete the import.
Update your Store Manager for WooCommerce to v.1.11.0.811. to manage your orders more effectively.
Get Store Manager For WooCommerce And Contribute to Managing Your Business
Import Orders Free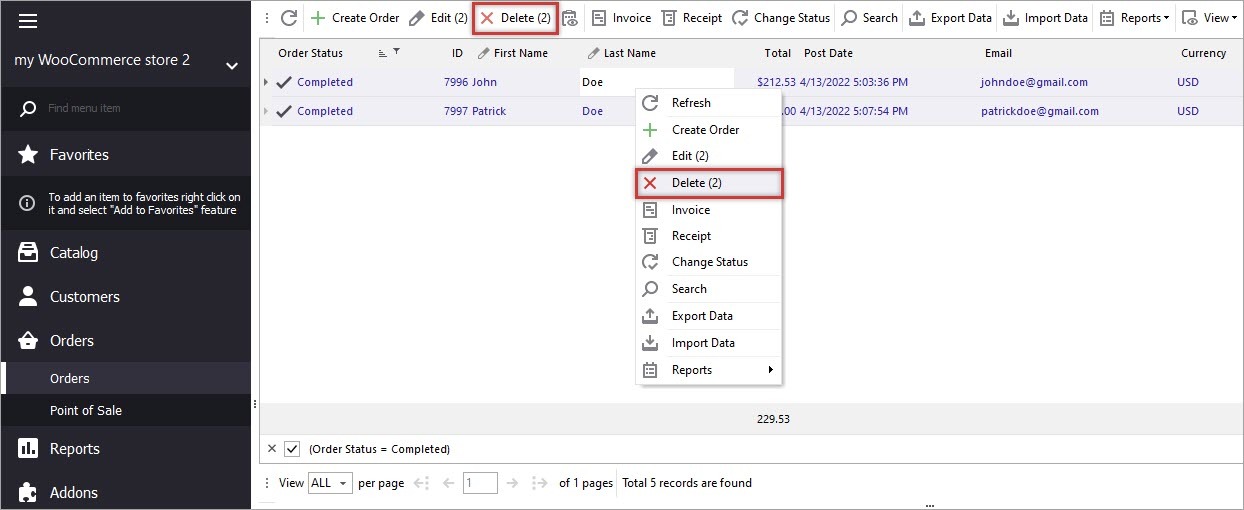
How to Remove WooCommere Orders
Do you need to remove WooCommerce orders with "Completed" status? Or you are moving from a shop with demo data to a new site and want to delete test records? Delete them one by one and in bulk with Store Manager. Read More...
WooCommerce – Order Export To CSV
Running an online store, you may need to export WooCommerce orders to CSV, for instance, to prepare a report for yourself or your supplier. Use Store Manager for advanced export. Read More...
COMMENTS
I want to upload orders from one woo commerce to another
Hi Abhishek,
You can export the Orders with Store Manager - check the following article for details:
WooCommerce – Order Export To CSV and then import them using the this article you added a comment to.
Please note, that WooCommerce automatically increments the order IDs, so if you want to keep the old order IDs, you can add them to the notes for future reference.
If you need any assistance, you are welcome to contact us via live chat or email - contact us.
