WooCommerce - Add Items to Orders by Scanning Barcodes
WooCommerce barcode scanning option is a great time-saver for the WooCommerce store owners running physical stores along with online ones. The scanner device usually works like "plug and play". You just plug the barcode scanner into a USB port and then scan barcodes to search for products in the database and them to an order.
The scanning option usually comes within a POS system. Below we’ll review the barcode scanning functionality which comes as a part of the Store Manager for WooCommerce POS tool.
If you don’t have Store Manager yet, download a free trial and install it on your computer. Connect the application to your store database and enjoy the simplicity of your store administration.
How to create a WooCommerce order by scanning a barcode
- Plug a barcode scanner into your PC via USB.
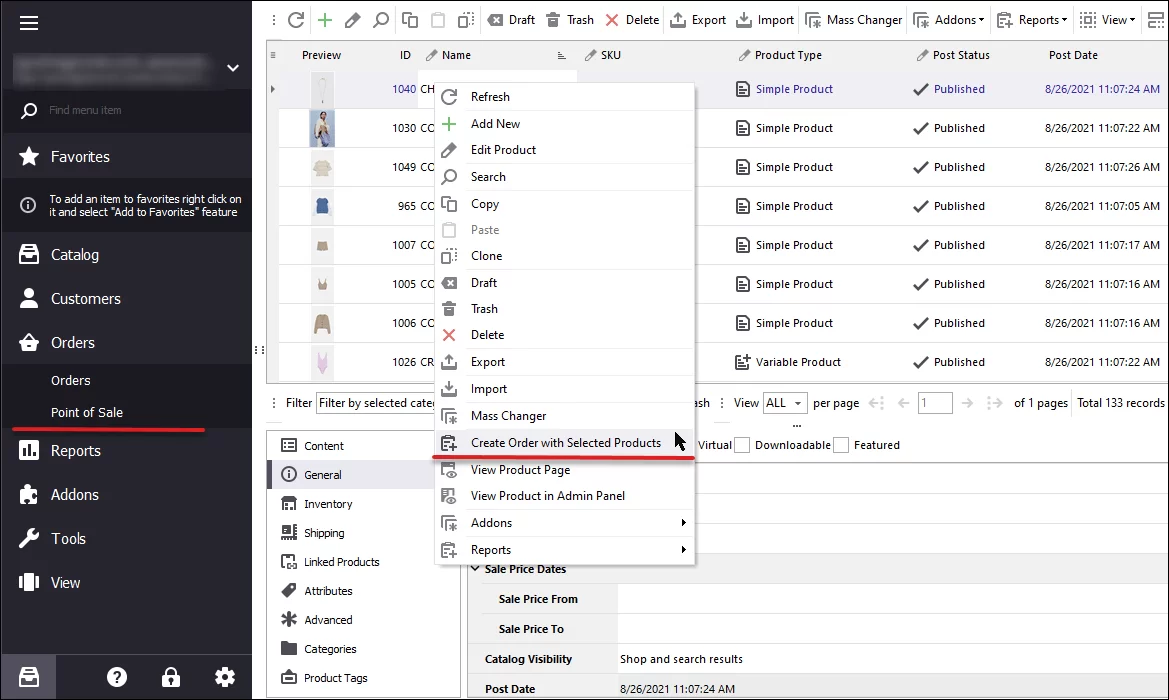
- Launch POS from the Store Manager menu > Ordes > Point of Sale and open scanner settings.
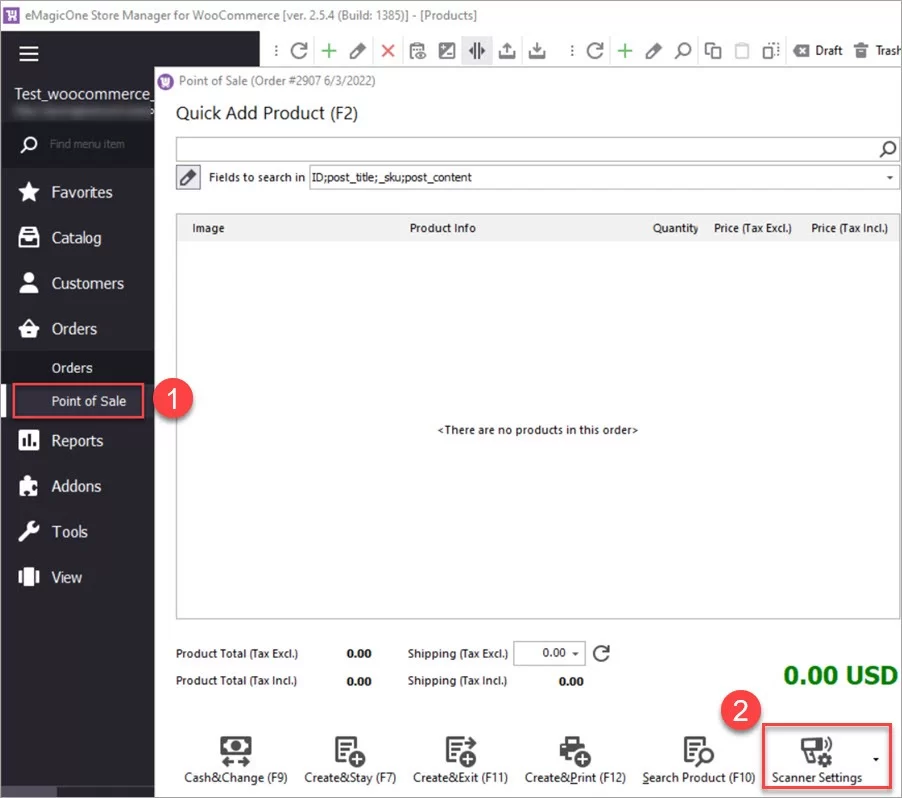
- Configure the scanner settings.
Select the barcode scanner input method:
- Handle as keyboard - scanning a codes searches for a froduct in the database (emulates entering a code on the keyboard and pressing “Enter”.)
- Handle as a barcode scanner - scanning a code automatically adds the product to an order (emulates entering a code on the keyboard, pressing “Enter” to find a product and one more “Enter” to add the product to an order.)
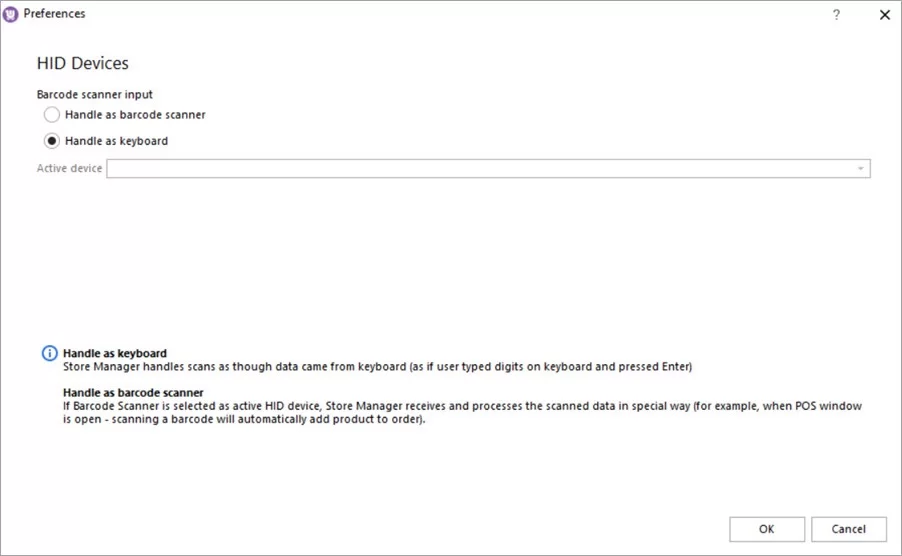
If you selected to handle the HID device as a barcode scanner, select an active device from the drop-down. Click OK to save and close the settings.
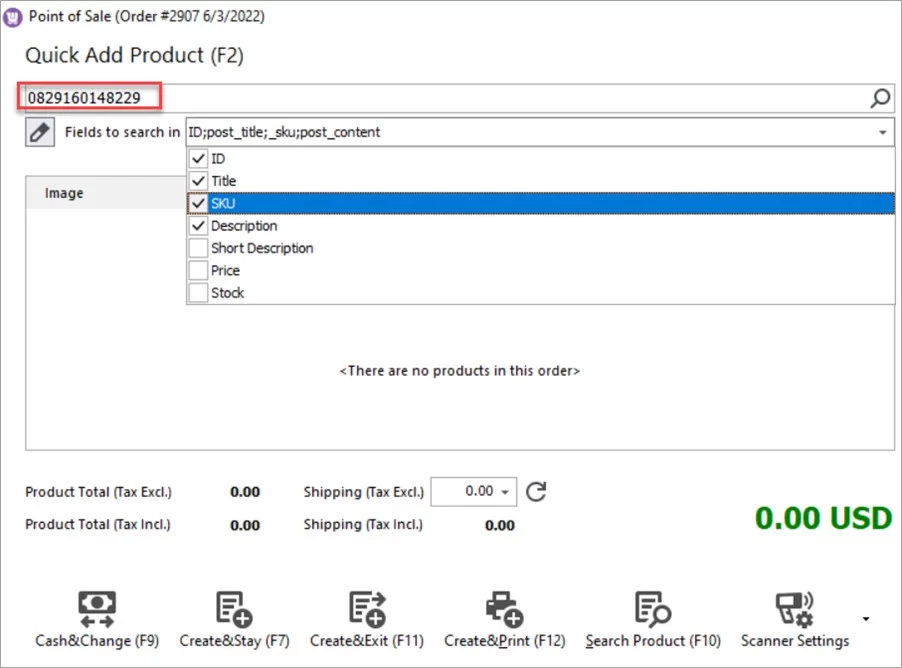
- Select the fields to search in.
Select the field where the barcode is stored. As WooCommerce doesn’t have the default EAN/UPC field, you can store the code either in the SKU, title or description field. In our case, the code is stored in the SKU field.
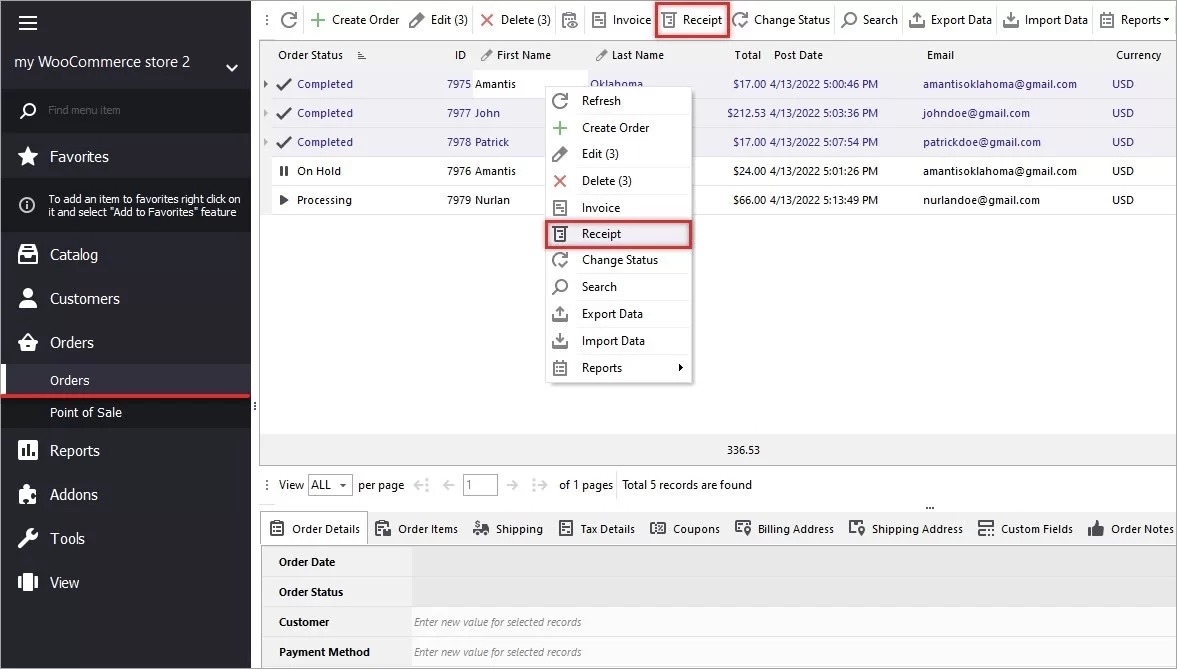
- Scan the barcode and create an order.
Scan the barcode to find the product in the database. To edit product’s quantity in the order, select the quantity and click Enter. Use the +/- key to increase or recrease the number or input a desired quantity.

Read the complete guide on how to create orders in POS via Store Manager.
As you can see, setting up WooCommerce barcode scanning and creating an order by scanning a barcode is pretty fast and easy. Try Store Manager for WooCommerce to test the POS tool and scanning option in particular. Download a free 14 day trial now!