How to Create WooCommerce Shipping Classes and Assign Them to Products
Having flexible and scalable WooCommerce shipping system is an essential part of your business. Shipping options ensure delivery cost will be included into shopper’s order and shipping fees will be covered.
In order to get shipping cost calculated in WooCommerce, you have to add required shipping classes, configure shipping methods and associate merchandise with corresponding shipping classes. In this post we’ll try to figure out how these settings are determined from Store Manager for WooCommerce application.
Store Manager for WooCommerce supports shipping class management starting from version 1.4.1.325. There are complete set of basic operations available, as well as shipping class export and bulk assign (by means of Mass Product Changer or via import).
Add WooCommerce Shipping Class
WooCommerce shipping class is a way to unite definite merchandise into groups for shipping. Further WooCommerce shipping classes are being associated with shipping cost.
To create a new shipping class, proceed with the described options:
- Navigate to Store Manager for WooCommerce > Customers > Shipping Classes.
- Press "Add New" on the toolbar and input all shipping class related details to make the record complete and recognizable.
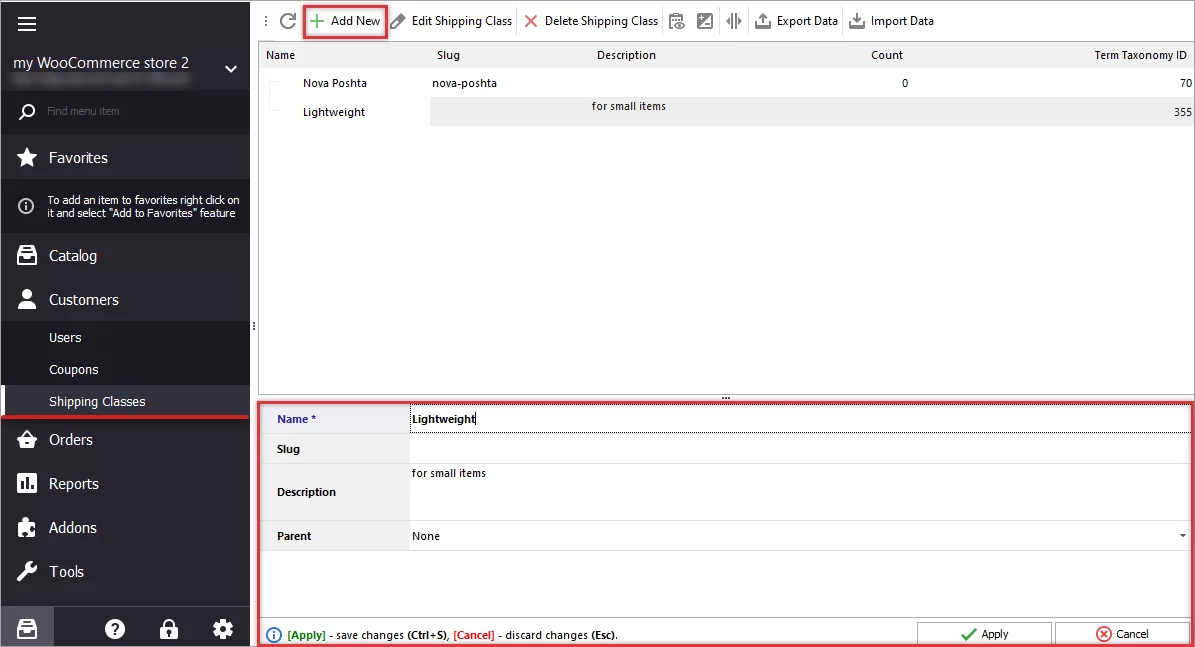
New WooCommerce Shipping Class Adding in Store Manager - Save the shipping class in Store Manager.
To set up shipping class cost, go to the WooCommerce admin panel. On the dashboard find the 'Settings' submenu. Afterwards select necessary shipping method and add charge value to each class you have.
Assign WooCommerce Shipping Class to Products
When it comes to assigning shipping class to WooCommerce products you would like to fulfill it in the most convenient way. Store Manager for WooCommerce allows you to bulk assign/change shipping class for multiple selected product with Mass Product Changer or via import.
Assign WooCommerce Shipping Class with Mass Product Changer
- Select products, WooCommerce shipping class will be ascribed to via Mass Product Changer;
- Launch Mass Product Changer either from context menu or from toolbar;
- Select Shipping Class field in the dropdown list of fields;
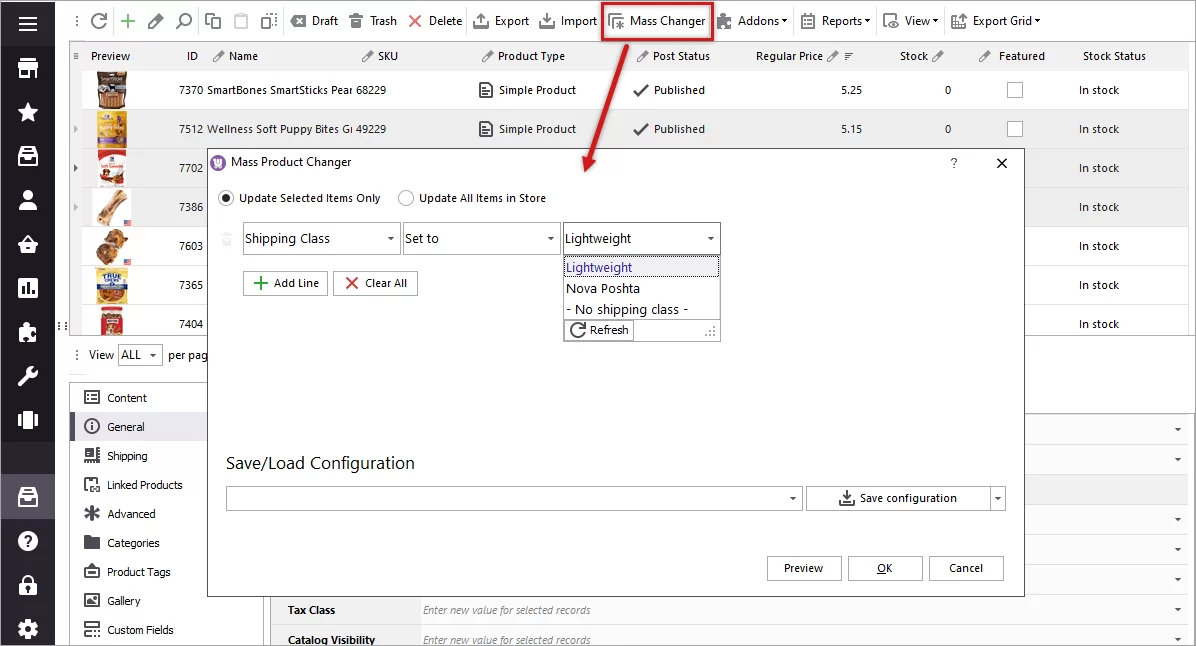
- Choose action in the following field;
- Select WooCommerce product shipping class in the last dropdown and save changes.
The update being accomplished there will appear log window in Store Manager for WooCommerce, so you can see what products have been modified.
Link WooCommerce Shipping Classes to Products in the Process of Import
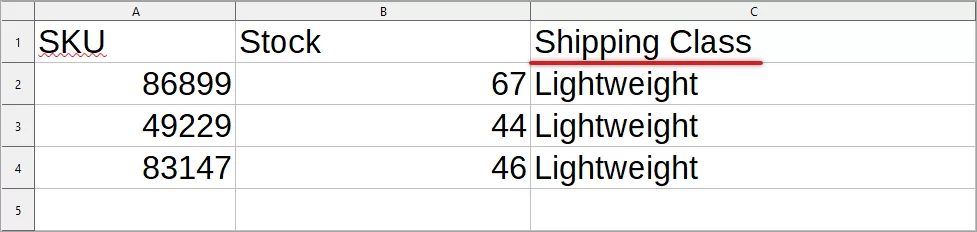
You may associate products with shipping classes (change or assign class) via WooCommerce import. If you have, for example, update some product details via import, Store Manager requires only product identifier (unique) and details to be changed.
The file is being uploaded to WooCommerce through the import wizard, the overall procedure is described thoroughly in this tutorial - https://woocommerce-manager.com/useful-articles/woocommerce-product-management/woocommerce-import-step-by-step-tutorial/
Make sure you mapped fields correctly and file column, listing shipping classes of uploaded products, is inked to corresponding database field.
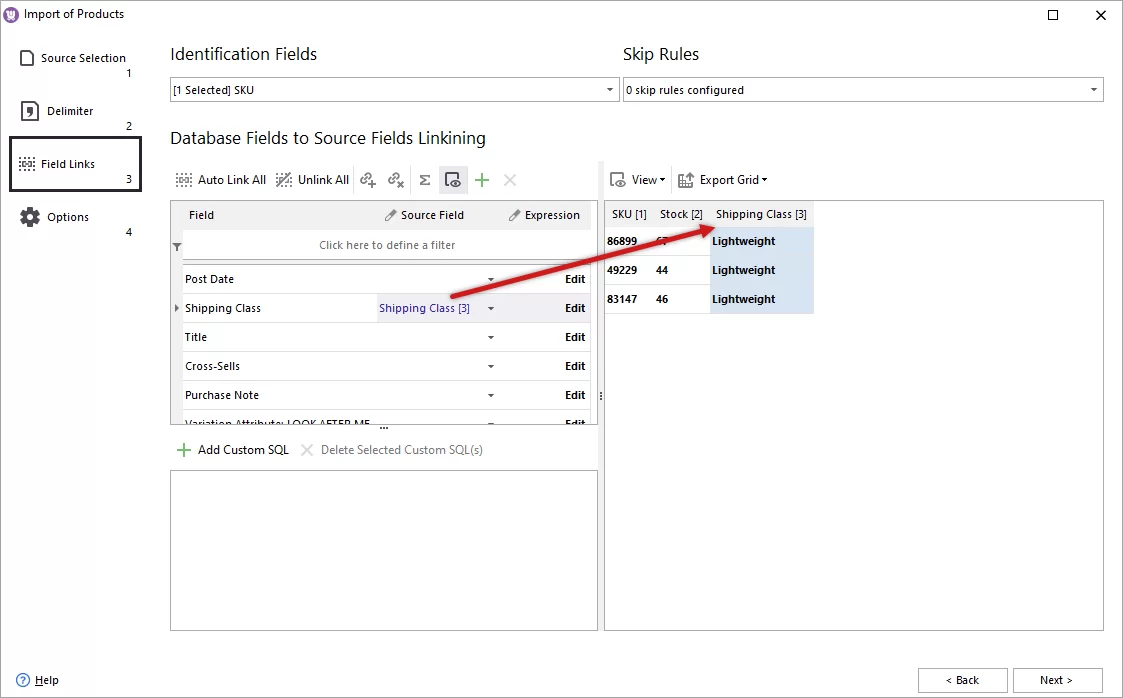
Once import is performed, you will find shipping classes assigned to all the items available in the import file.