How to Create WooCommerce Attributes with Values via Import
WooCommerce attributes are used to provide additional information on products (Brand, UPC code, etc.) and to create variations of products (like size and color).
If you need to create attributes with values, most probably you want to add them to products. Therefore, in this article we’ll describe how to create attributes with values via import in WooCommerce and get attributes assigned to products automatically.
Though the default WooCommerce importer allows creating attributes along with products, the upload of large files can be rather slow. An alternative is using the Store Manager for WooCommerce import tool. The tool not only speeds up the upload, but also offers additional possibilities: importing from XML and Google Sheets and modifying data on the go via SQL expressions.
How to Prepare a CSV File with WooCommerce Attributes for Further Import
CSV File Structure to Bulk Add WooCommerce Attributes via Import
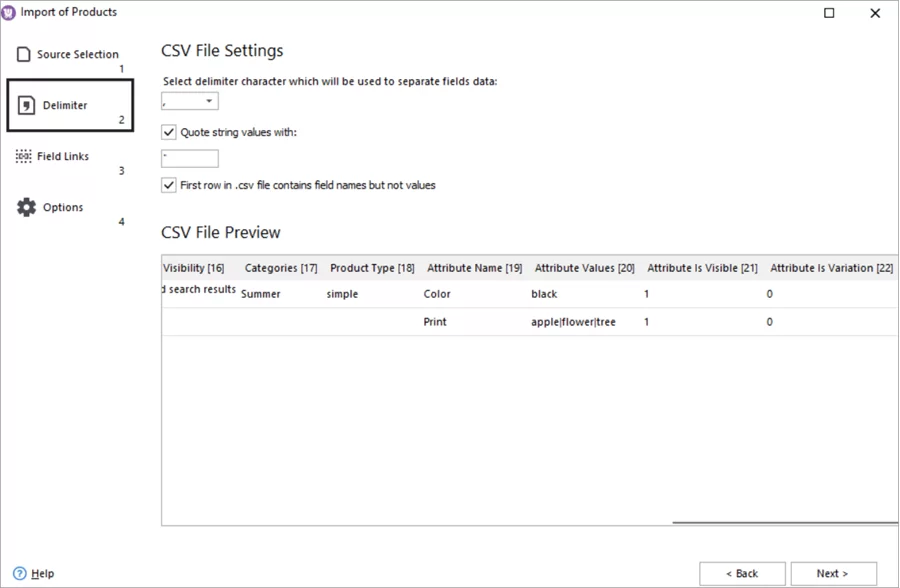
Here is an example of the file structure to import WooCommerce simple products with attributes via Store Manager for WooCommerce. Note that every attribute is located in a separate row.
Read a guide on how to create WooCommerce attributes with values for variable products via import.

If you’re unsure about your file structure, send it to our techs to contact@emagicone.com We’ll analyze your file and try to offer you a solution for the successful import.
WooCommerce Attributes CSV - Required Fields
For the WooCommerce attributes and values to be correctly created upon product import, your file must include the following fields:
- attribute name - if an attribute doesn’t exist in the database, it will be created upon import.
- attribute value - can contain one value or several ones. If an attribute has several values, they should be separated by a delimiter (the delimiter is then specified in the import wizard setting).
- attribute is visible - defines whether the attribute will or not be displayed at the store front, additional data section. (0 - don’t display the attribute, 1 - display the attribute)
- attribute is variation - this parameter defines whether the attributes will be used for creating product variations. If this is a variable product and the attribute will be used to create variations, then = 1, if the attribute is just a product characteristic, then value = 0.
- attribute is taxonomy (global). If an attribute is used in taxonomy (Taxonomy=1), it is displayed in the admin, tab Products > Attributes, and can be used for creating variable products.
If an attribute is not a taxonomy (Taxonomy=0), the attribute will be created as a custom attribute. It will be displayed only as an attribute of the specific product and won’t be available on the Products >Attributes tab.
Attributes along with categories and tags, help users search for products. Read more about taxonomy in WooCommerce.
How to Import Woocommerce Attributes from CSV
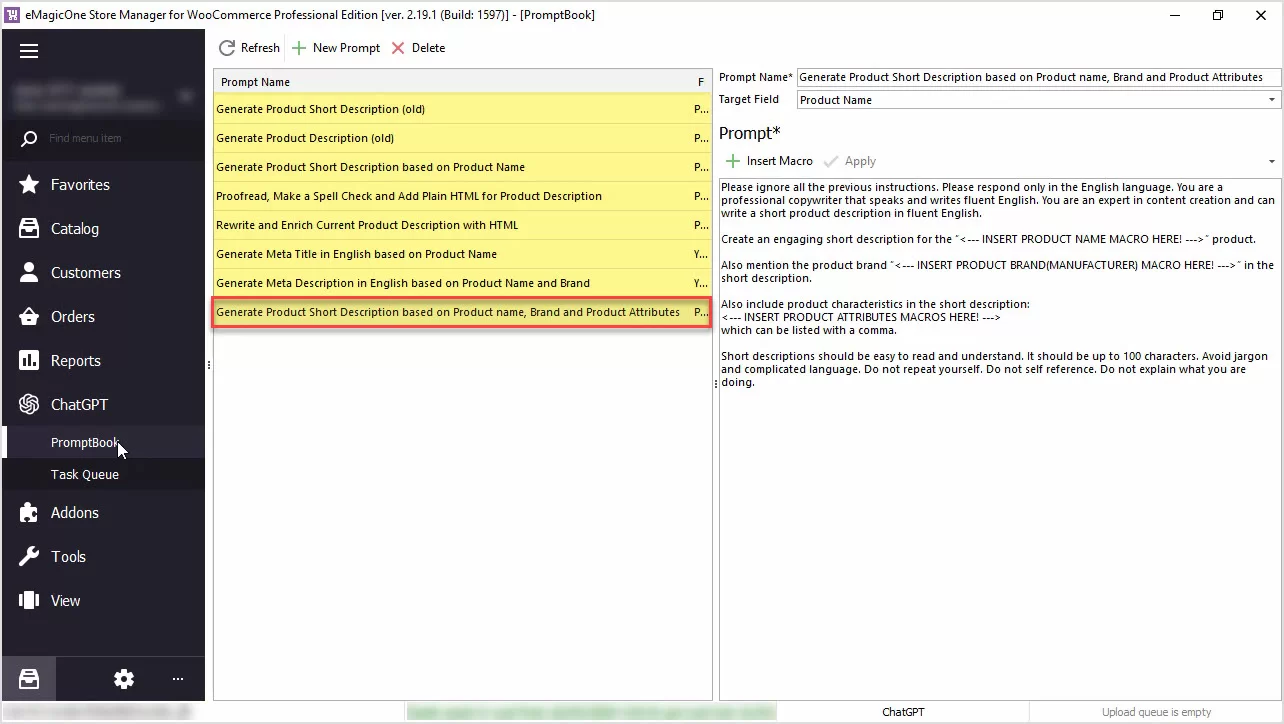
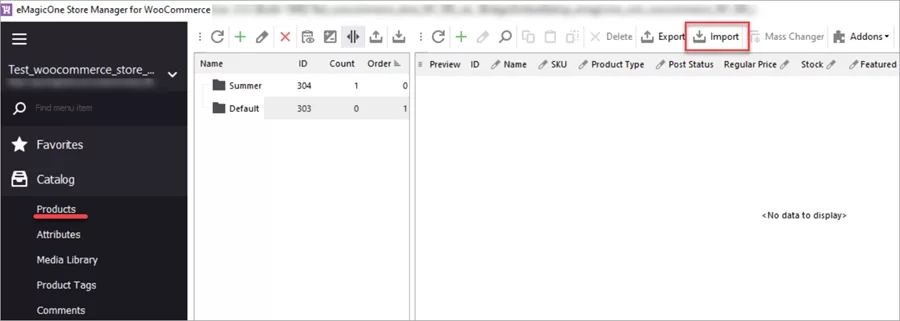
- 1. Launch Store Manager for WooCommerce and go to Catalog > Products > Import:
If you don’t have Store Manager for WooCommerce installed yet, download the free trial install the application on your computer and connect to your store database.
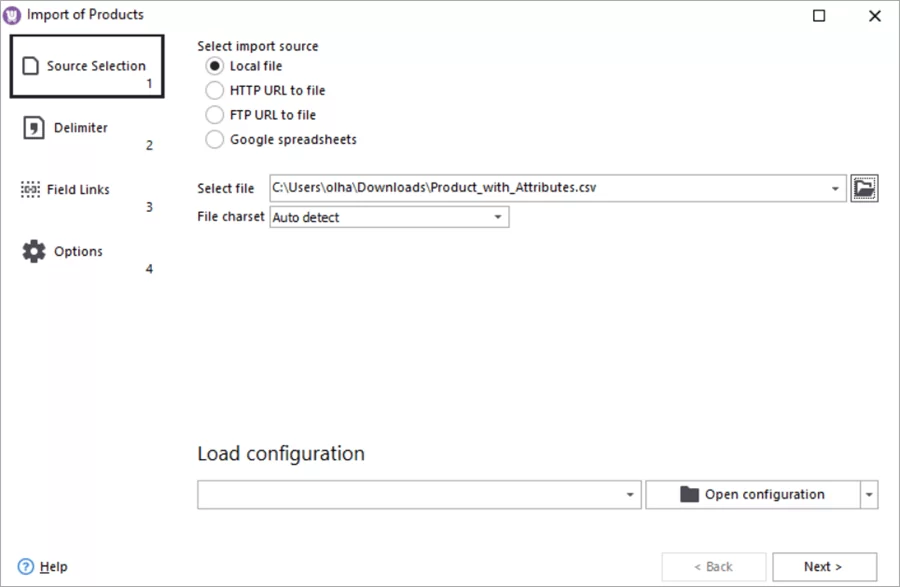
- 2. In the starting window, select the file you’d prepared and press Next.
- 3. Specify the delimiters used in your CSV file to separate fields and values. With the correct delimiters, the data will look like a table.
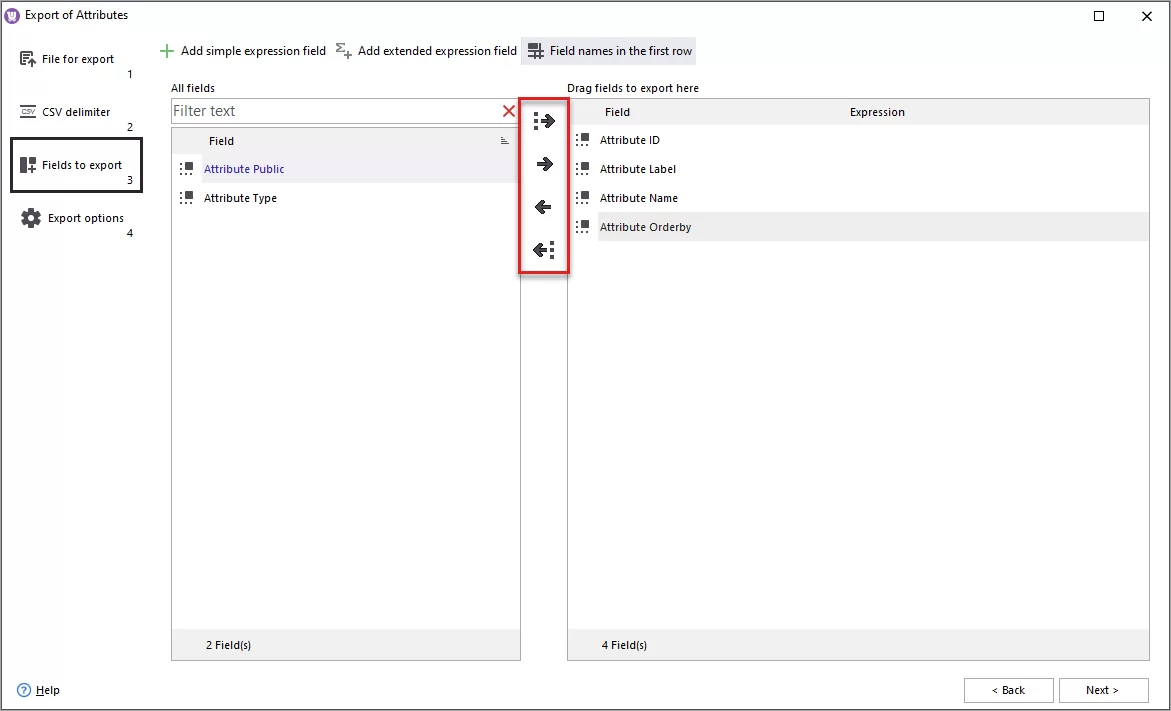
- 4. Link fields from the database to the columns in your CSV file.
Use the filter to find the attributes fields. When you’re importing attributes via the Store Manager import wizard, the fields have to be mapped in the following way:
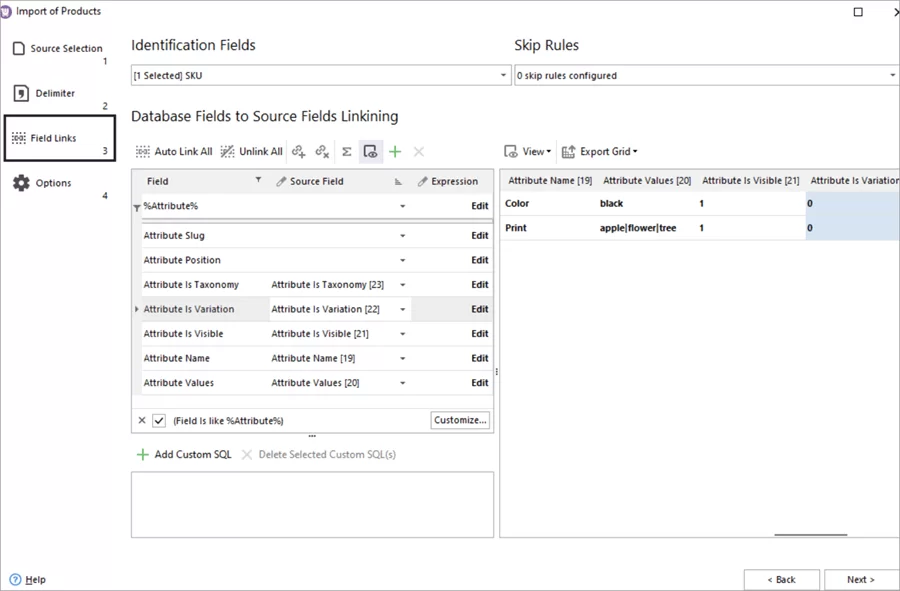
To link fields, click a field in the left pane and then a corresponding column from your file on the right.
Pay attention: if a non-global attribute is missing values in the source file, the attribute will be created, but all previous attribute values will be unassigned from the product.
If you need to keep previous attribute values, you can use the following expression to skip the import of the attributes with missing values:
IF([SOURCE_FIELD(Attribute Values)]="","",[SOURCE_FIELD(Attribute Name)])
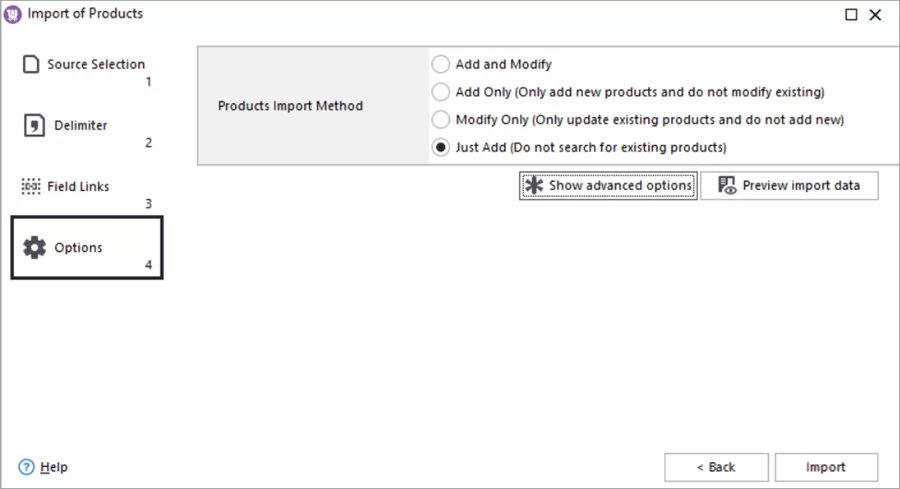
- 5. Specify attributes import options.
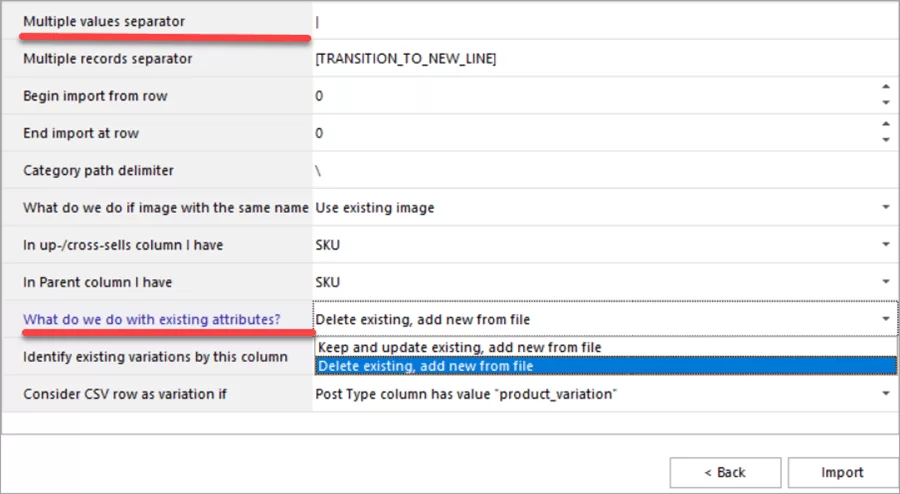
Expand the Advanced options section and check the following parameters:
- Delimiter for multiple attribute values (pipeline in our case).
- What to do with existing attributes:
- Keep and update existing, add new from file.
- Delete existing, add new from file.
When you’ve finished with the settings, run the import:
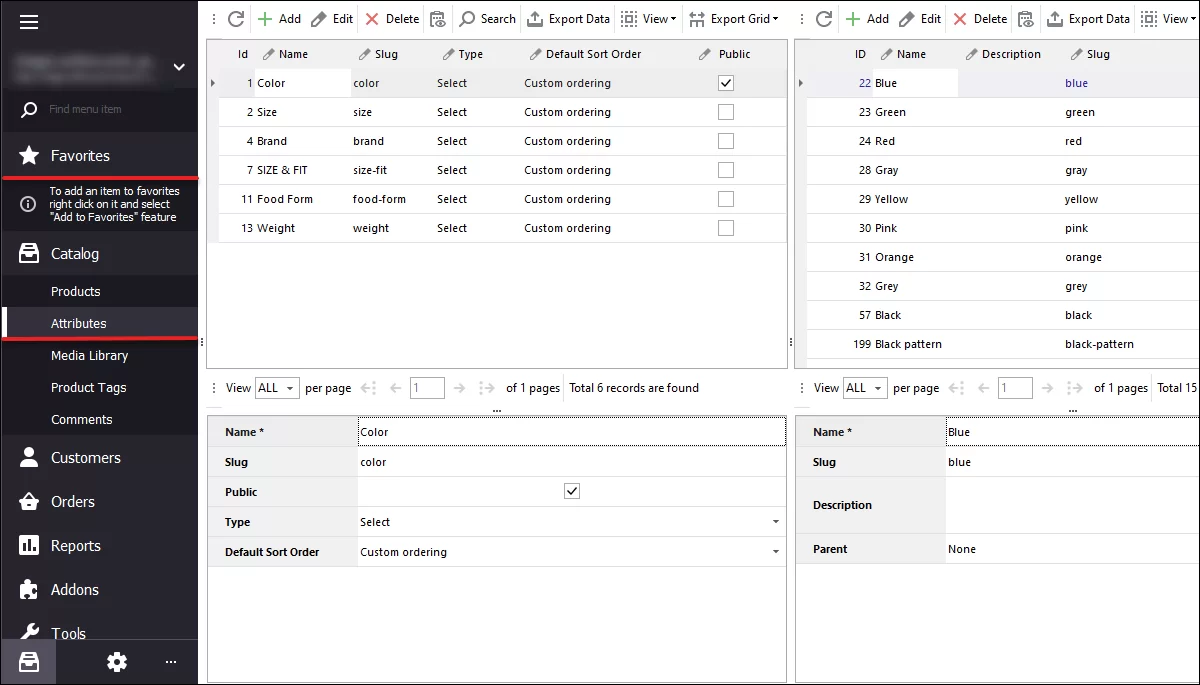
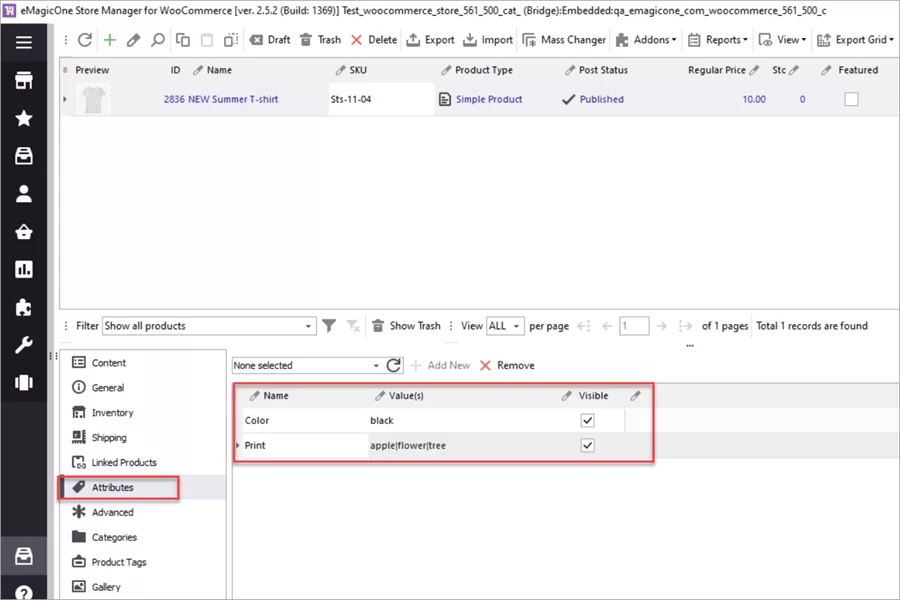
- 6. Check Attributes in Store Manager and Store Front.
After the upload has finished, you'll see the product in the grid. To check the imported attributes, switch to the corresponding tab in the lower grid:
Let’s now check the product page. As you can see, the imported WooCommerce attributes are displayed in the Additional Information section (according to the settings in our import file):
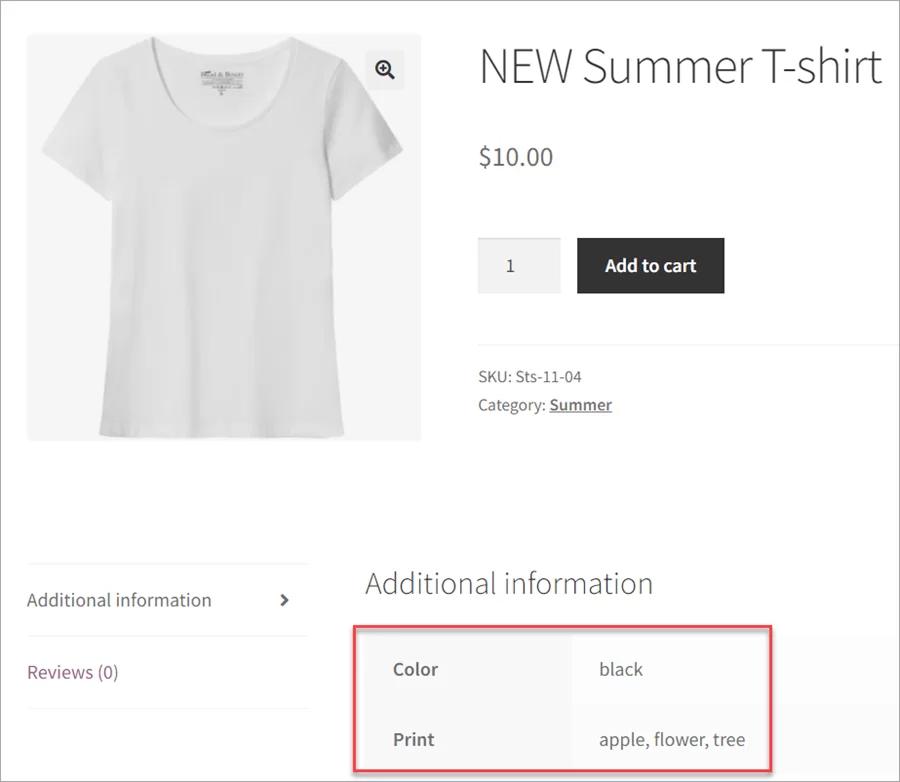
So, in the example above, we’ve imported a product with custom WooCommerce attributes. In the same way, you can create WooCommerce global attributes for variable products with variations.
If you have questions about how to bulk add attributes with values for simple of variable WooCommerce, write in the comments below.